
English
Installation and development environments
Installing the .NET SDK
Visual Studio 2026 installs the .NET SDK automatically. You need to install the SDK separately to work in Visual Studio Code, JetBrains Rider, or only at the command line. Instructions for all systems are available in the documentation at https://learn.microsoft.com/dotnet/core/install/.
Windows
Open the download page at https://dotnet.microsoft.com/download/dotnet/10.0 and, in the Windows row of the SDK 10.0.x table, choose the installer for your architecture—usually x64, or Arm64 for computers with Snapdragon processors (Fig. 1.5).
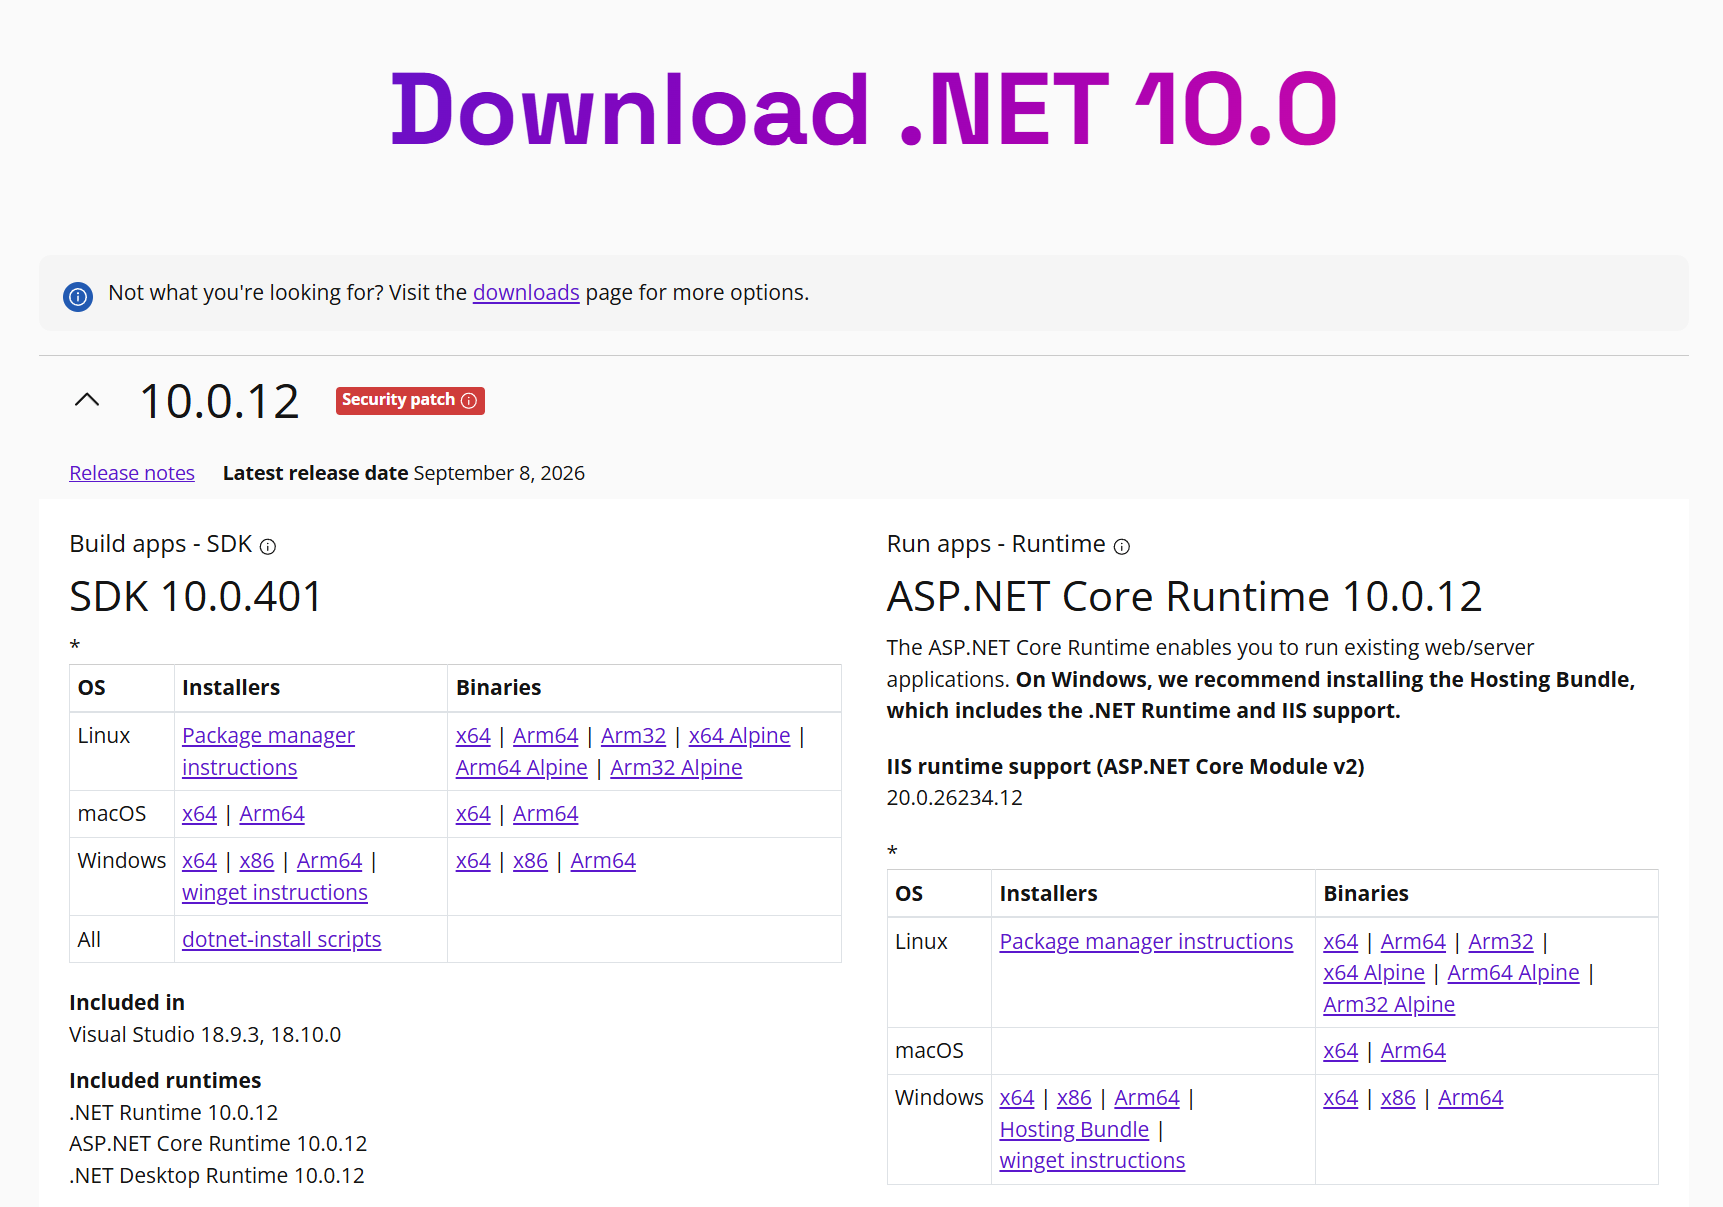
Figure 1.5. .NET 10 download page
Run the downloaded dotnet-sdk-10.0.xxx-win-x64.exe file, click Install, and confirm the User Account Control prompt. When finished, the installer displays Installation was successful (Fig. 1.6).
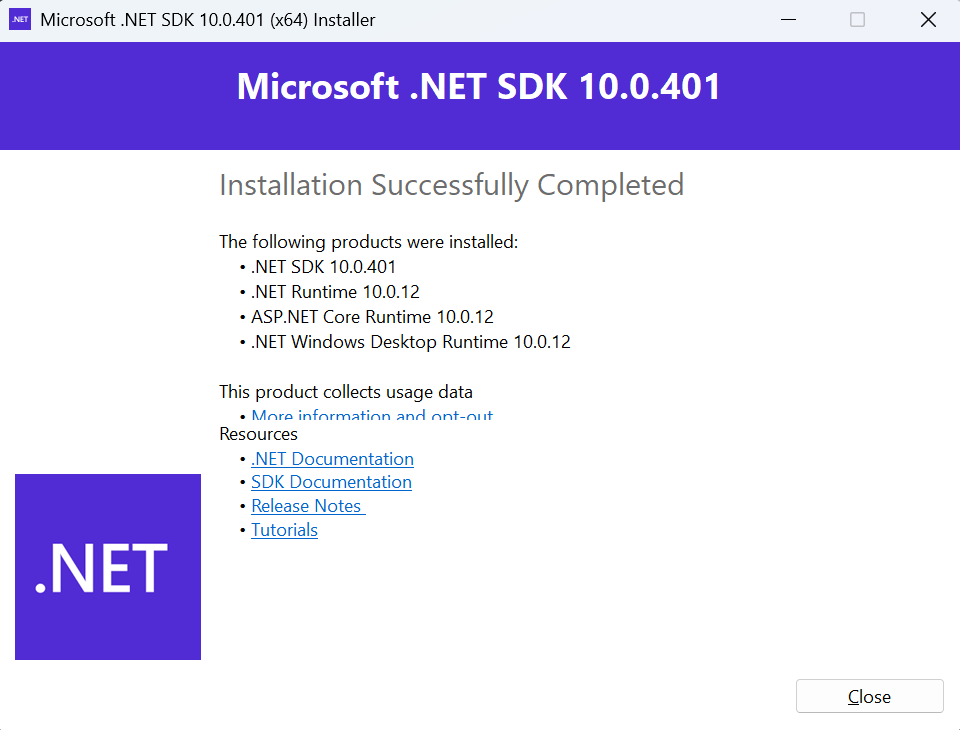
Figure 1.6. Completed .NET SDK installation on Windows
Another option is WinGet, the package manager built into Windows 11. Open a terminal (Start → Terminal) and run:
winget install Microsoft.DotNet.SDK.10Linux
On Linux, install .NET from your distribution's package repository. On Ubuntu 24.04 and later, the .NET 10 package is available in the standard repository (Fig. 1.7):
sudo apt-get update
sudo apt-get install -y dotnet-sdk-10.0
On Fedora, use sudo dnf install dotnet-sdk-10.0. Commands for other distributions are listed in the documentation at https://learn.microsoft.com/dotnet/core/install/linux. If the package is not in the repository, you can install the SDK with the dotnet-install script (https://learn.microsoft.com/dotnet/core/tools/dotnet-install-script).
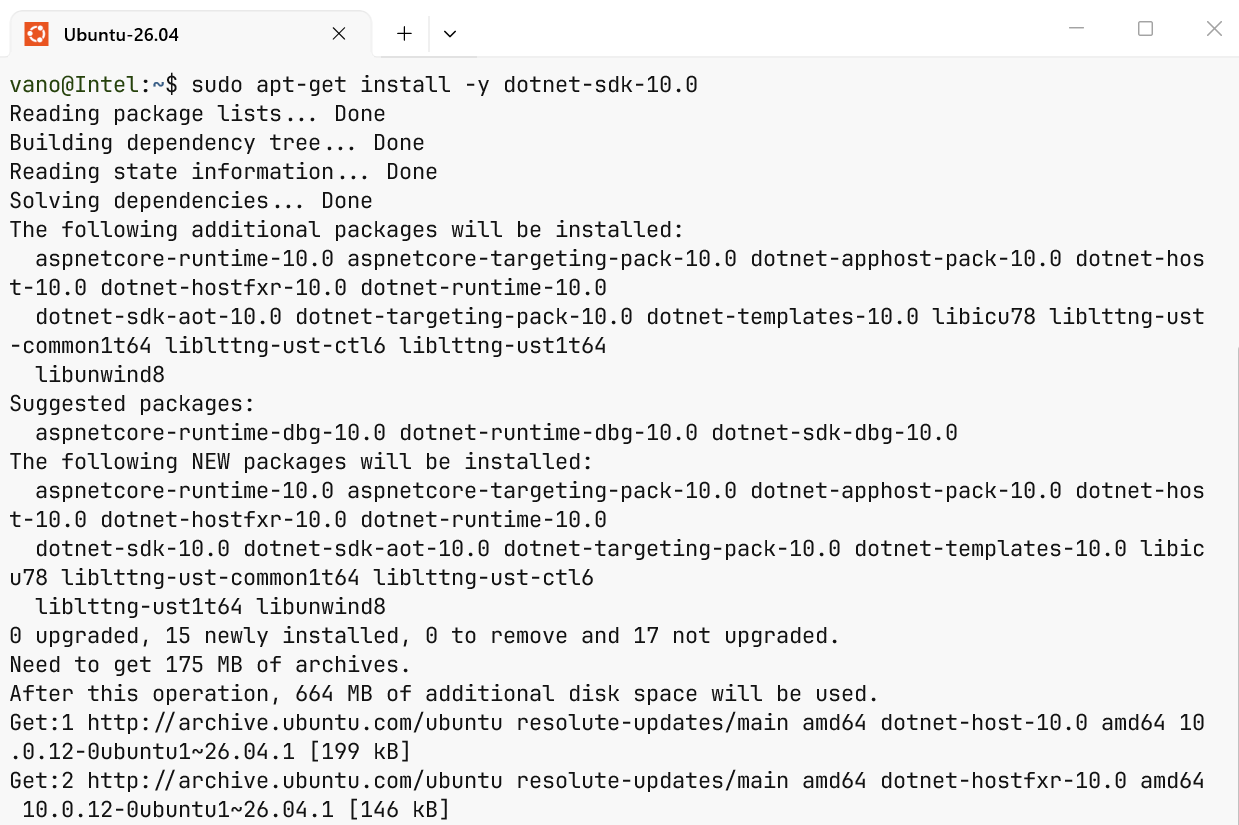
Figure 1.7. Installing the .NET SDK on Ubuntu
macOS
On the download page, choose the macOS installer: Arm64 for Apple Silicon computers or x64 for Intel computers. Run the .pkg file and follow the installation wizard. For details, see https://learn.microsoft.com/dotnet/core/install/macos.
Verifying the installation
After installation, open a new terminal and run dotnet --info. It displays the SDK version, runtimes, operating system, and processor architecture (Fig. 1.8).
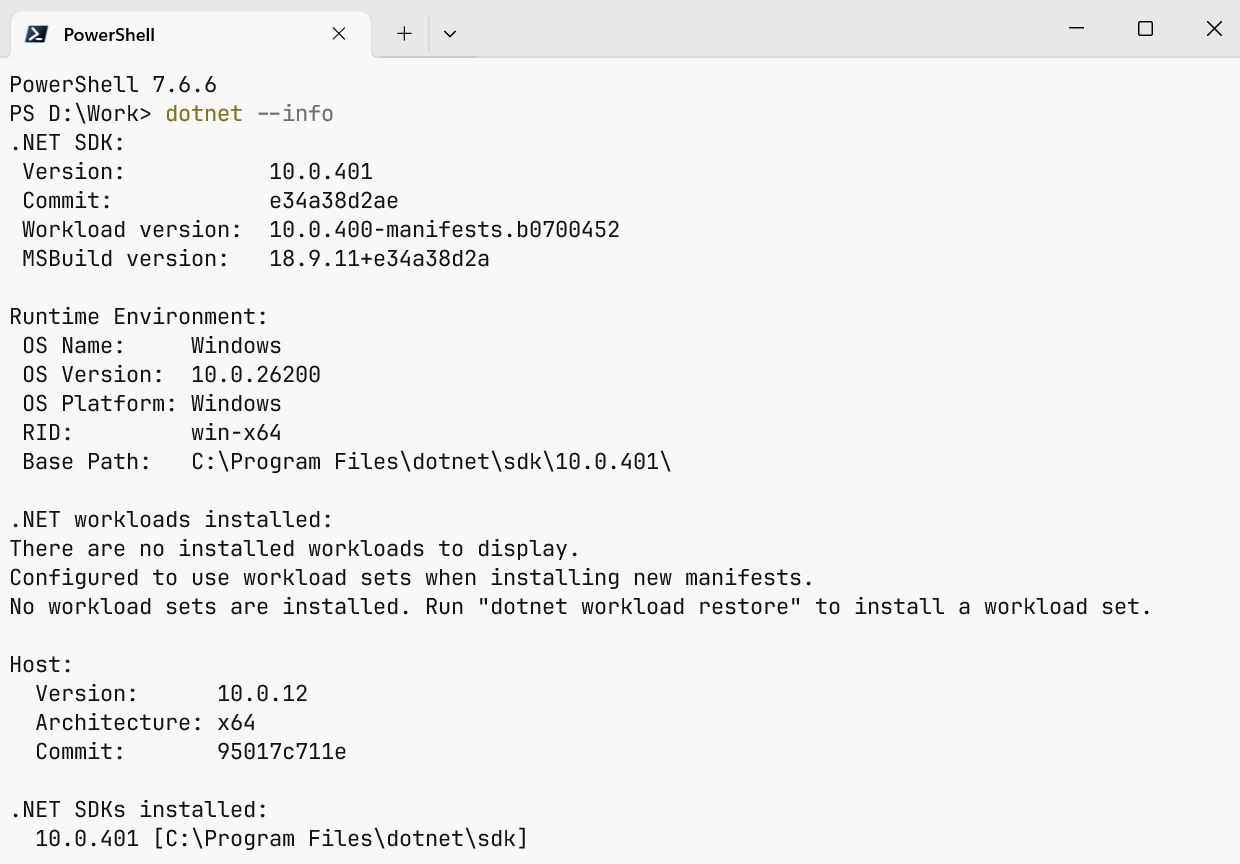
Figure 1.8. Output of dotnet --info
Tip
If the terminal reports that dotnet was not found, close all terminal windows and open a new one: the PATH environment variable is updated only for new windows. If this does not help, restart your computer.
The Visual Studio 2026 development environment
Microsoft Visual Studio 2026 is a full-featured IDE (Integrated Development Environment) for Windows. It combines a code editor with IntelliSense suggestions, a compiler, a debugger, visual interface designers, and testing and profiling tools.
Visual Studio has three editions: Community, Professional, and Enterprise. Community is free for individual developers, classroom learning, academic research, and open-source projects (https://visualstudio.microsoft.com/vs/community/). Its capabilities are sufficient for the entire course.
System requirements
Visual Studio 2026 officially supports 64-bit Windows 11 (including Arm64 processors) and Windows Server 2019, 2022, and 2025. Requirements:
- an x64 or Arm64 processor, preferably with four or more cores;
- at least 4 GB of RAM; 16 GB recommended;
- 20–50 GB of free disk space for a typical installation, preferably on an SSD;
- a screen resolution of at least 1366 × 768; 1920 × 1080 recommended.
Full requirements are available at https://learn.microsoft.com/visualstudio/releases/2026/vs-system-requirements.
Downloading and installing
- Open https://visualstudio.microsoft.com/downloads/ and click Free download under Community (Fig. 1.9). This downloads a small
VisualStudioSetup.exefile—the Visual Studio Installer. - Run the file and accept the license terms. The installer downloads the required components.
- On the Workloads tab, select the .NET desktop development workload (Fig. 1.10). It contains everything needed for C# console and desktop applications, including the .NET 10 SDK. You can add web application support later with the ASP.NET and web development workload.
- On the Language packs tab, keep English as the interface language (Fig. 1.11): menu names in the lectures, documentation, and most learning materials are in English.
- Click Install and wait for completion. Installation takes 10–40 minutes depending on your internet speed.
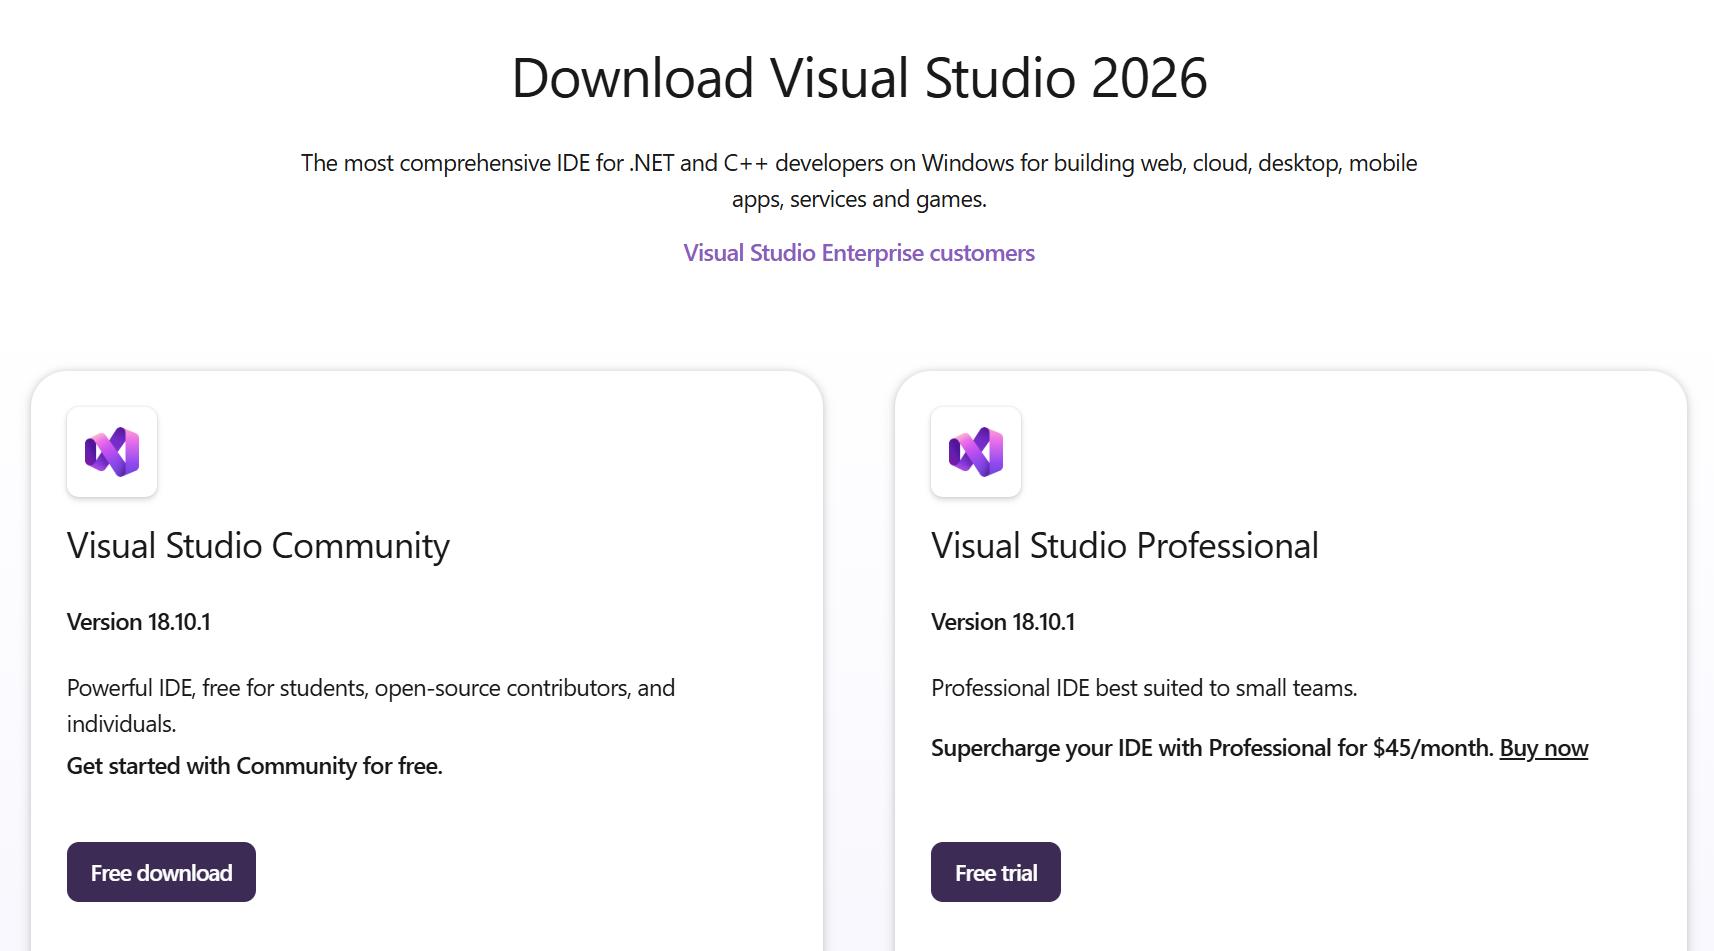
Figure 1.9. Visual Studio 2026 download page
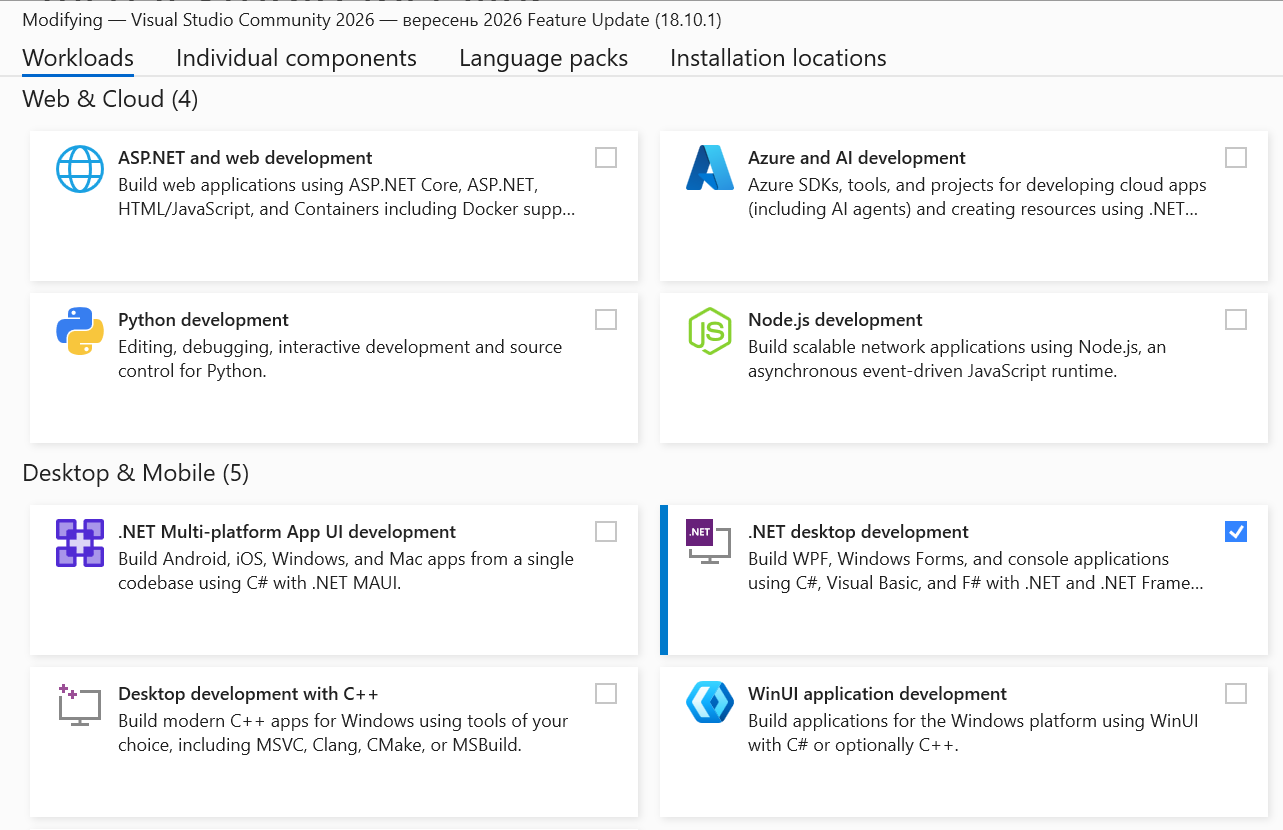
Figure 1.10. Selecting a workload in Visual Studio Installer
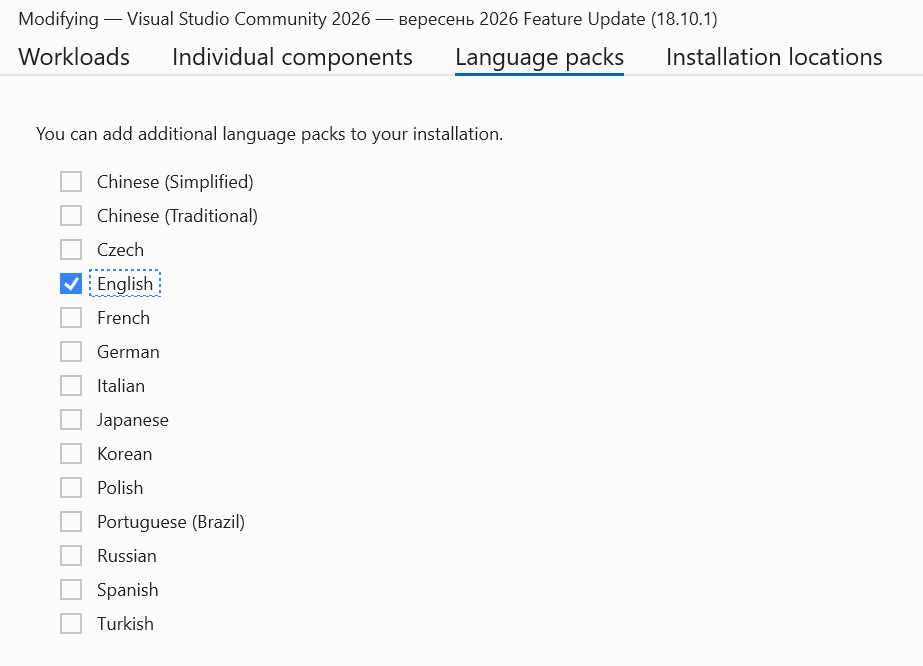
Figure 1.11. Selecting an interface language in Visual Studio Installer
You can change the installed components at any time: use Tools → Get Tools and Features… in Visual Studio or the Modify button in Visual Studio Installer.
On first launch, Visual Studio asks you to sign in with a Microsoft account (you can skip this with Skip and add accounts later) and choose a color theme. The start window then opens (Fig. 1.12).
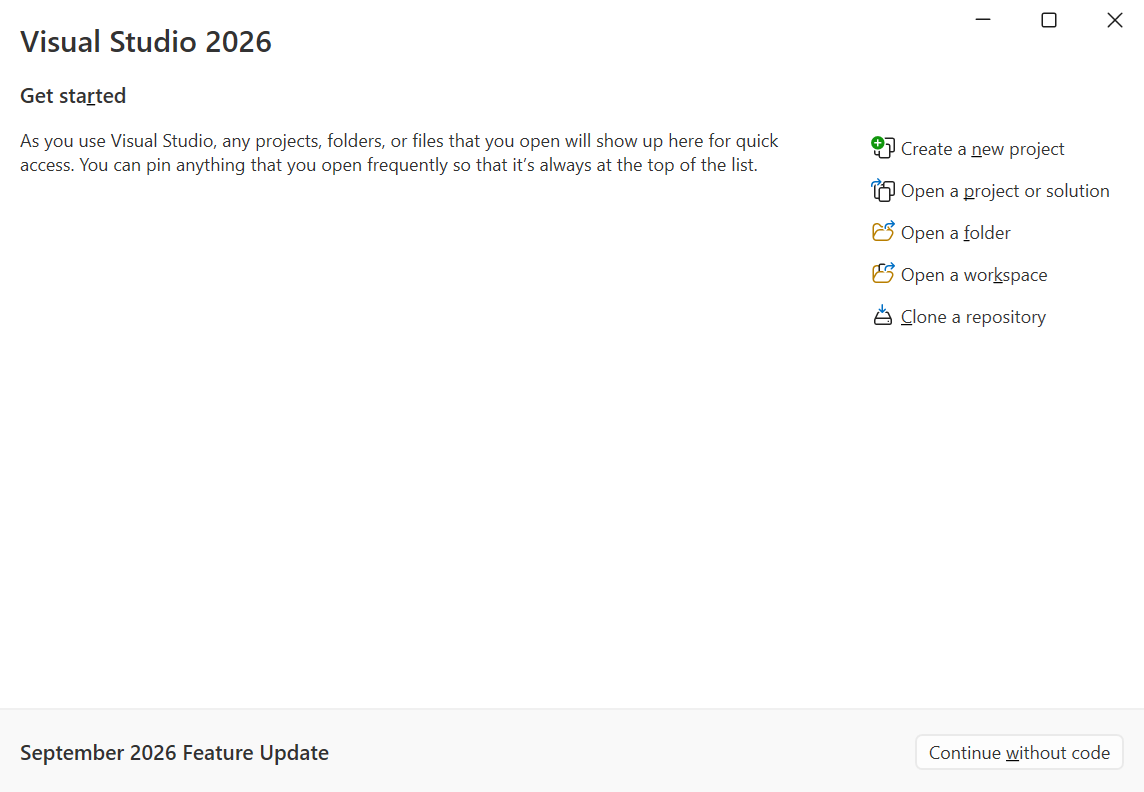
Figure 1.12. Visual Studio 2026 start window
Creating a console project
- In the start window, click Create a new project (or use File → New → Project…).
- Enter
consolein the search box, select the Console App template labeled C#, and click Next (Fig. 1.13). Do not confuse it with Console App (.NET Framework), which targets the legacy platform. - In Configure your new project, enter a Project name, such as
Hello, a folder (Location), and a Solution name (Fig. 1.14). Use Latin letters without spaces for names. - In Additional information, choose .NET 10.0 (Long Term Support) (Fig. 1.15). Leave Do not use top-level statements unchecked to give the program the simplest structure. Click Create.
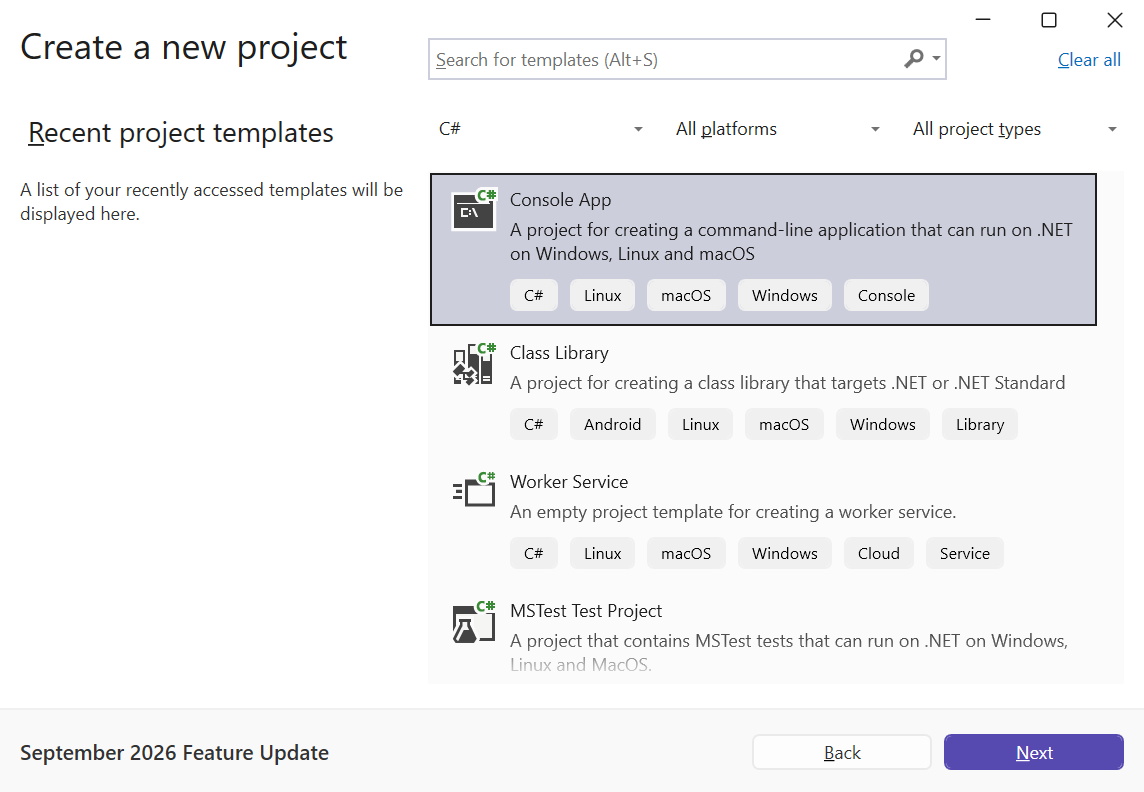
Figure 1.13. Selecting a console application template
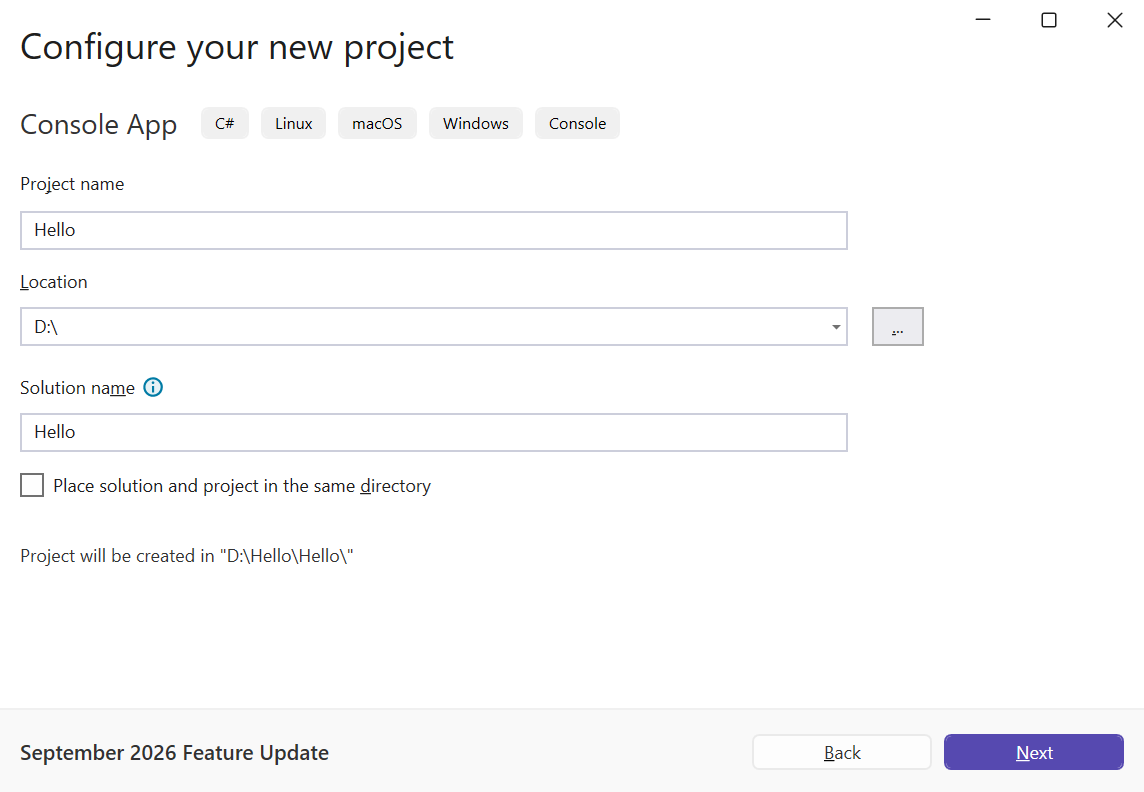
Figure 1.14. Configuring the project name and location
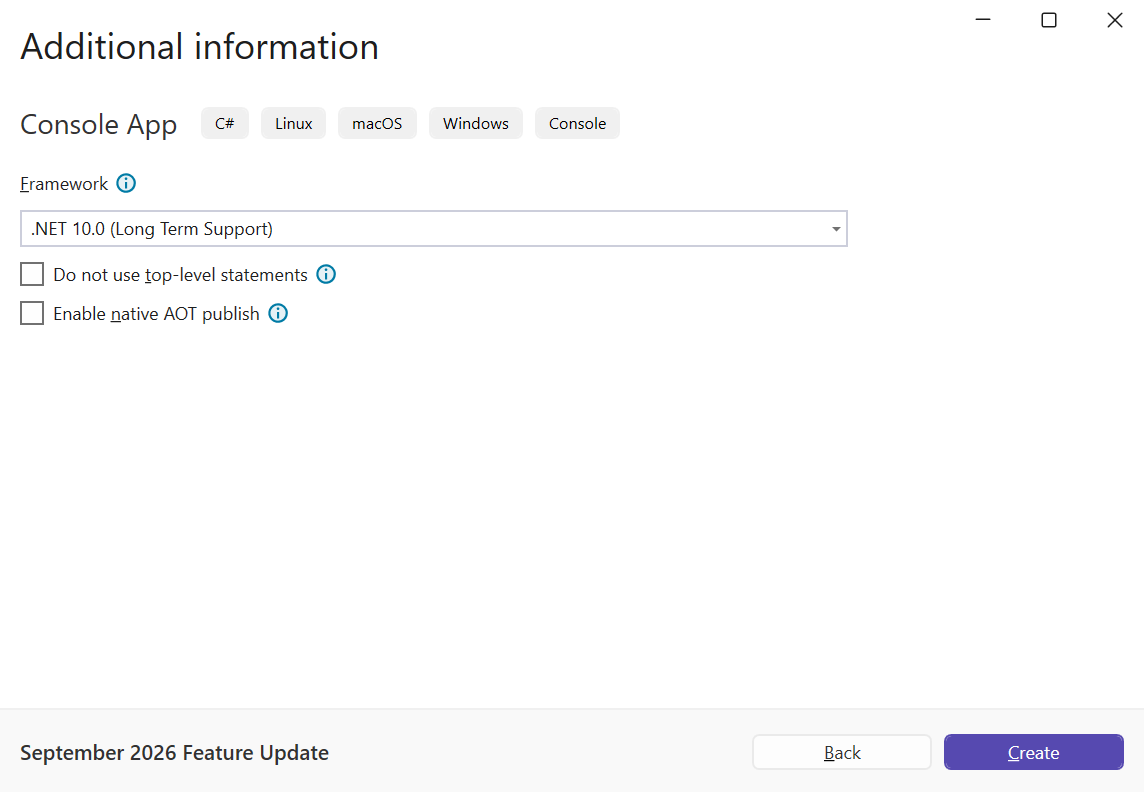
Figure 1.15. Selecting the .NET 10 target framework
Visual Studio creates a solution containing one project and opens Program.cs (Fig. 1.16). The Solution Explorer window on the right shows the solution structure (if hidden, use View → Solution Explorer); the Output and Error List windows are at the bottom.
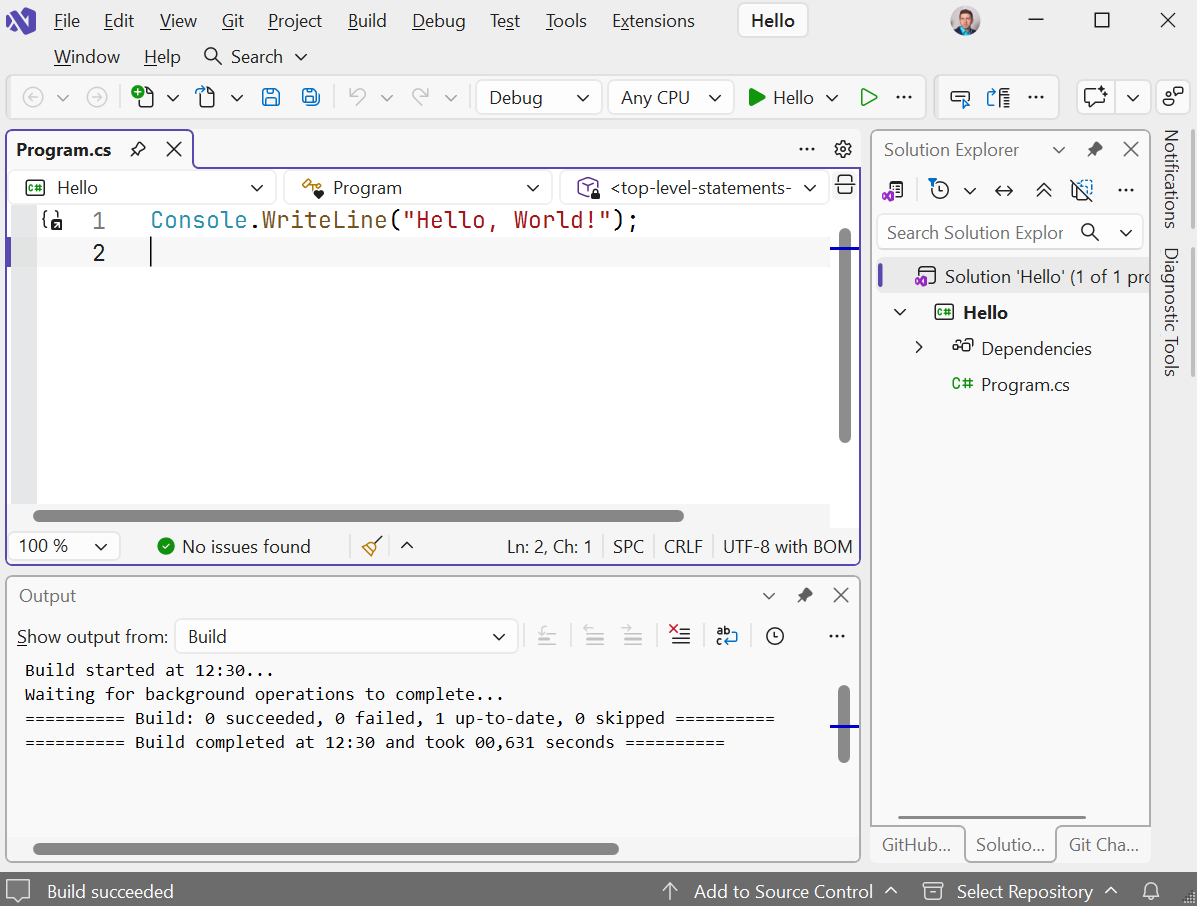
Figure 1.16. Visual Studio main window with the Hello project
To run the program, press Ctrl+F5 (Debug → Start Without Debugging). Visual Studio builds the project and opens a console window with the output (Fig. 1.17). F5 (Debug → Start Debugging) runs the program under the debugger.
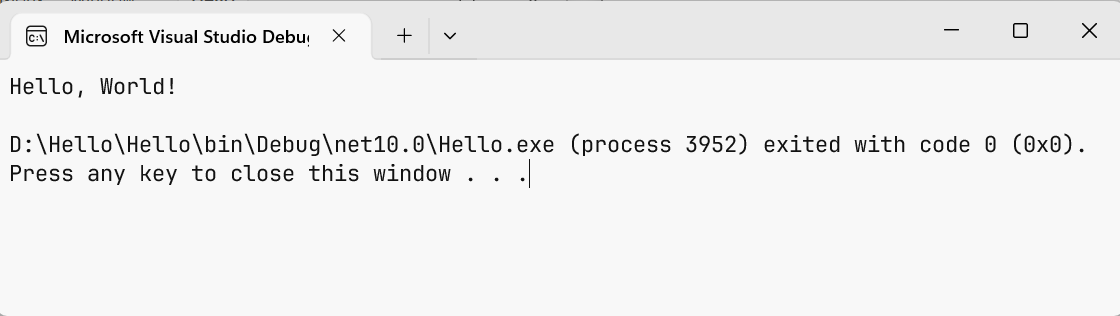
Figure 1.17. Program output in the console window
Note
After the program finishes, the Visual Studio console window stays open until you press a key. If you double-click Hello.exe in the bin folder, the window closes as soon as the program finishes—in that case, run the program from a terminal.
Useful Visual Studio shortcuts: Ctrl+Shift+B — build the solution; Ctrl+K, Ctrl+D — format code; Ctrl+. — fixes and suggestions for the selected code; Ctrl+Space — IntelliSense list; F12 — go to definition. Beginner's guide: https://learn.microsoft.com/visualstudio/get-started/csharp/.
Visual Studio Code and C# Dev Kit
Visual Studio Code is a free, cross-platform code editor for Windows, Linux, and macOS. Microsoft's C# Dev Kit extension provides C# support: IntelliSense suggestions, Solution Explorer, running, debugging, and testing. C# Dev Kit is free for individual developers, education, and open-source projects under the same terms as Visual Studio Community; you must sign in with a Microsoft account to activate it.
- Install the .NET SDK (see above).
- Download VS Code from https://code.visualstudio.com/download and install it.
- Open the Extensions panel (Ctrl+Shift+X), find Microsoft's C# Dev Kit, and click Install (Fig. 1.18). The C# and .NET Install Tool extensions are installed with it. Extension page: https://marketplace.visualstudio.com/items?itemName=ms-dotnettools.csdevkit.
- Open the Command Palette (Ctrl+Shift+P), enter .NET: New Project…, and choose the Console App template, folder, and project name (Fig. 1.19). Alternatively, create the project in a terminal with
dotnet new console -n Helloand open its folder using File → Open Folder… - Open
Program.csand press F5. The program runs, and its output appears in the Debug Console panel or the terminal (Fig. 1.20).
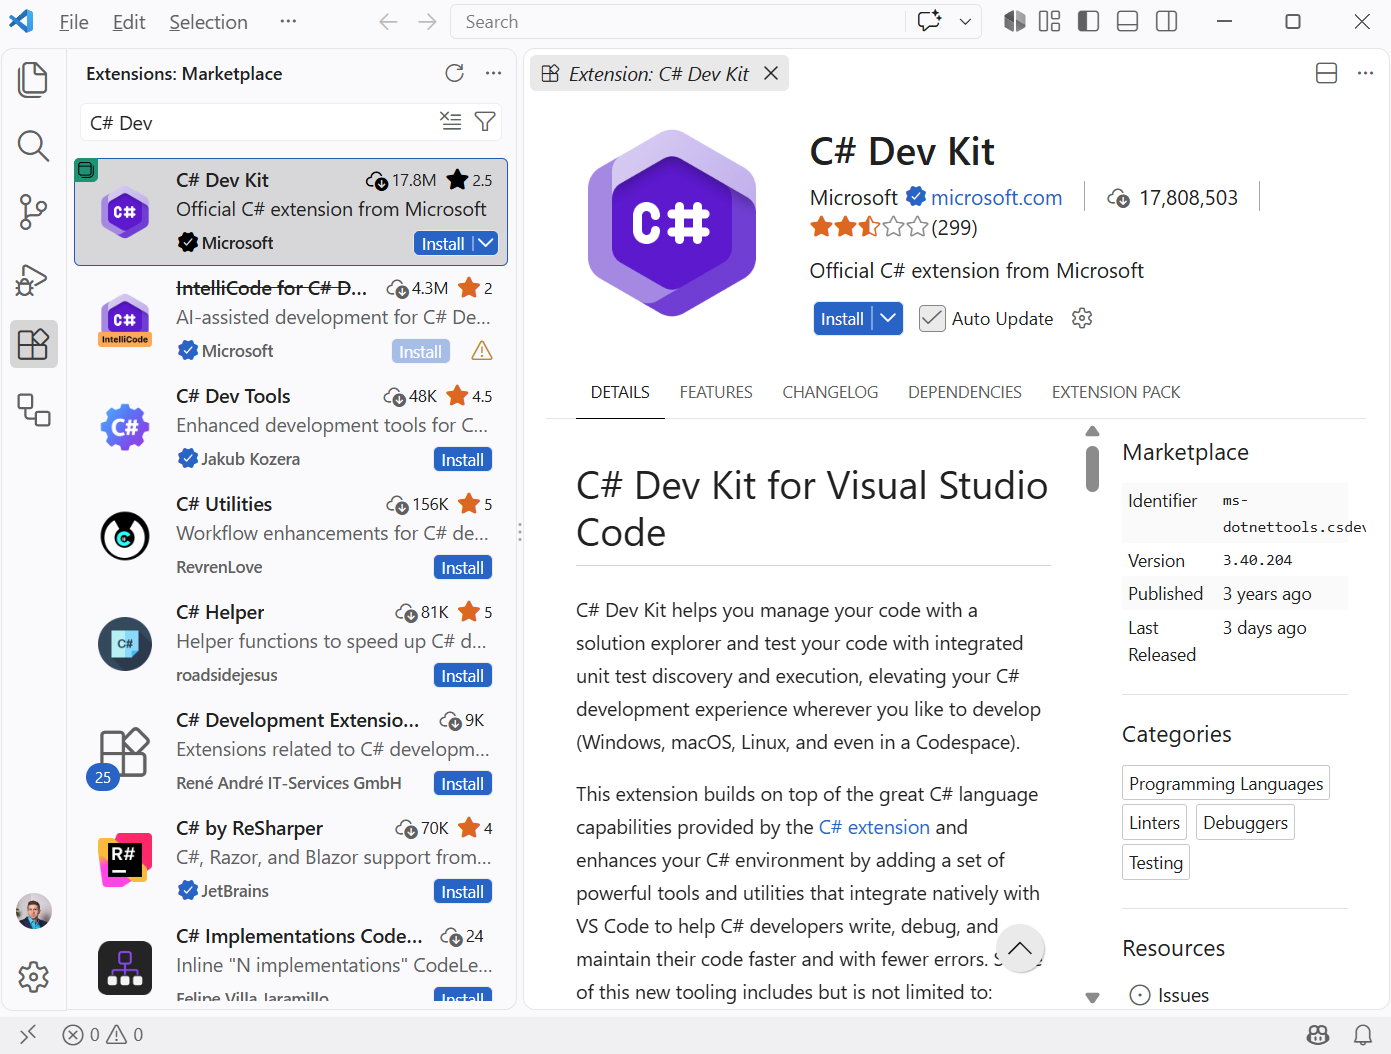
Figure 1.18. Installing the C# Dev Kit extension in VS Code
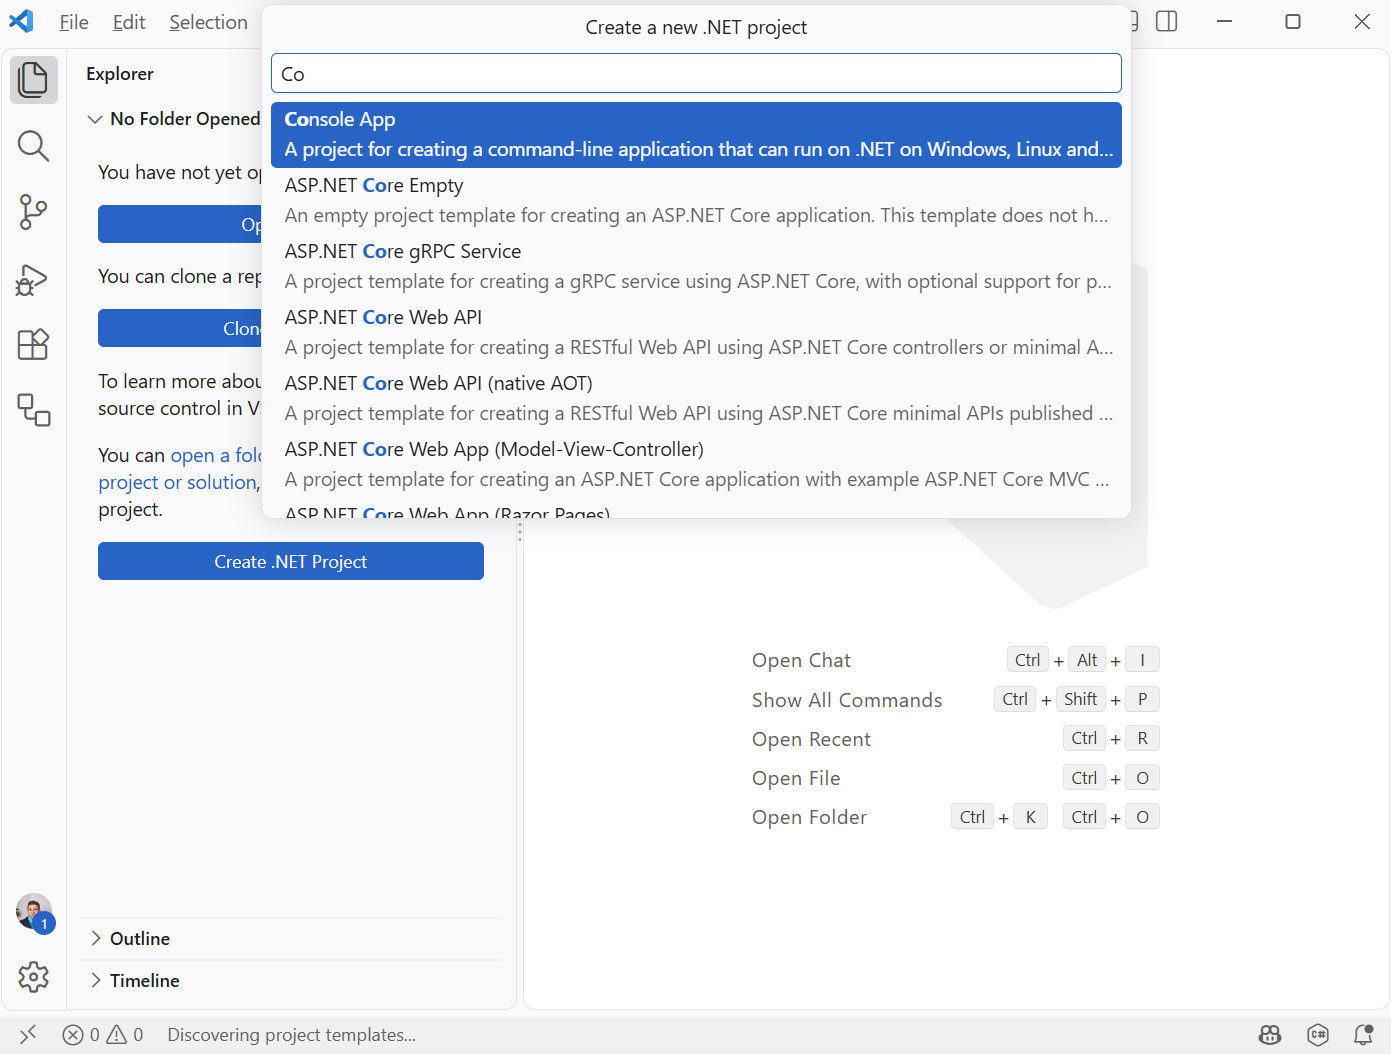
Figure 1.19. Creating a project through the VS Code Command Palette
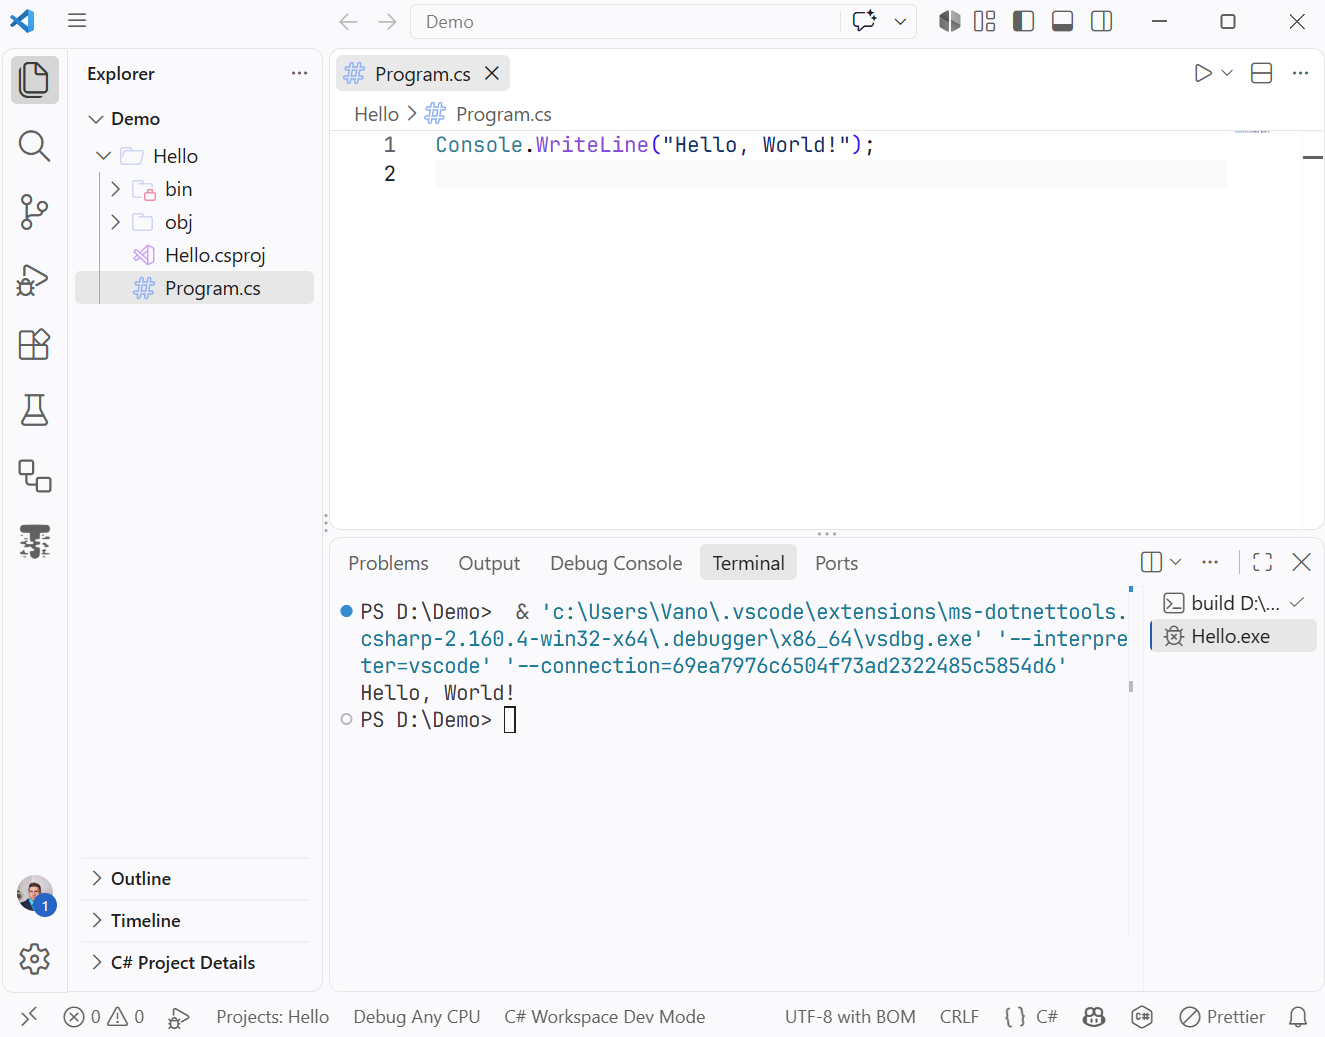
Figure 1.20. Running a console project in VS Code
For more about working with C# in VS Code, see https://code.visualstudio.com/docs/csharp/get-started.
JetBrains Rider
JetBrains Rider is a cross-platform .NET IDE from JetBrains for Windows, Linux, and macOS. Rider is free for non-commercial use, including education; students can also obtain a free educational license for all JetBrains products (https://www.jetbrains.com/community/education/).
- Install the .NET SDK (see above).
- Download Rider from https://www.jetbrains.com/rider/download/ or install it through Toolbox App (https://www.jetbrains.com/toolbox-app/), which updates JetBrains products.
- On first launch, choose a license type: Non-commercial use, or sign in with a JetBrains account with an educational license. The welcome window opens (Fig. 1.21).
- Click New Solution, select the Console template, enter the solution and project names, folder, and net10.0 target framework, then click Create (Fig. 1.22).
- Run the program with the toolbar Run button or Ctrl+F5; the output appears in the Run window (Fig. 1.23).
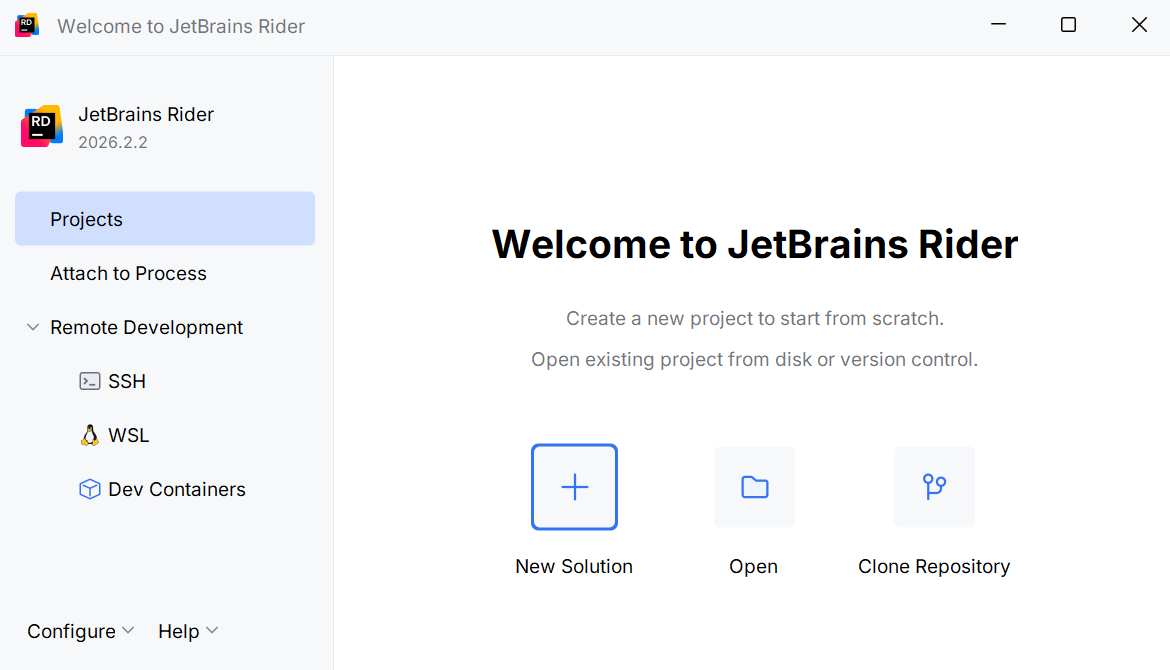
Figure 1.21. JetBrains Rider welcome window
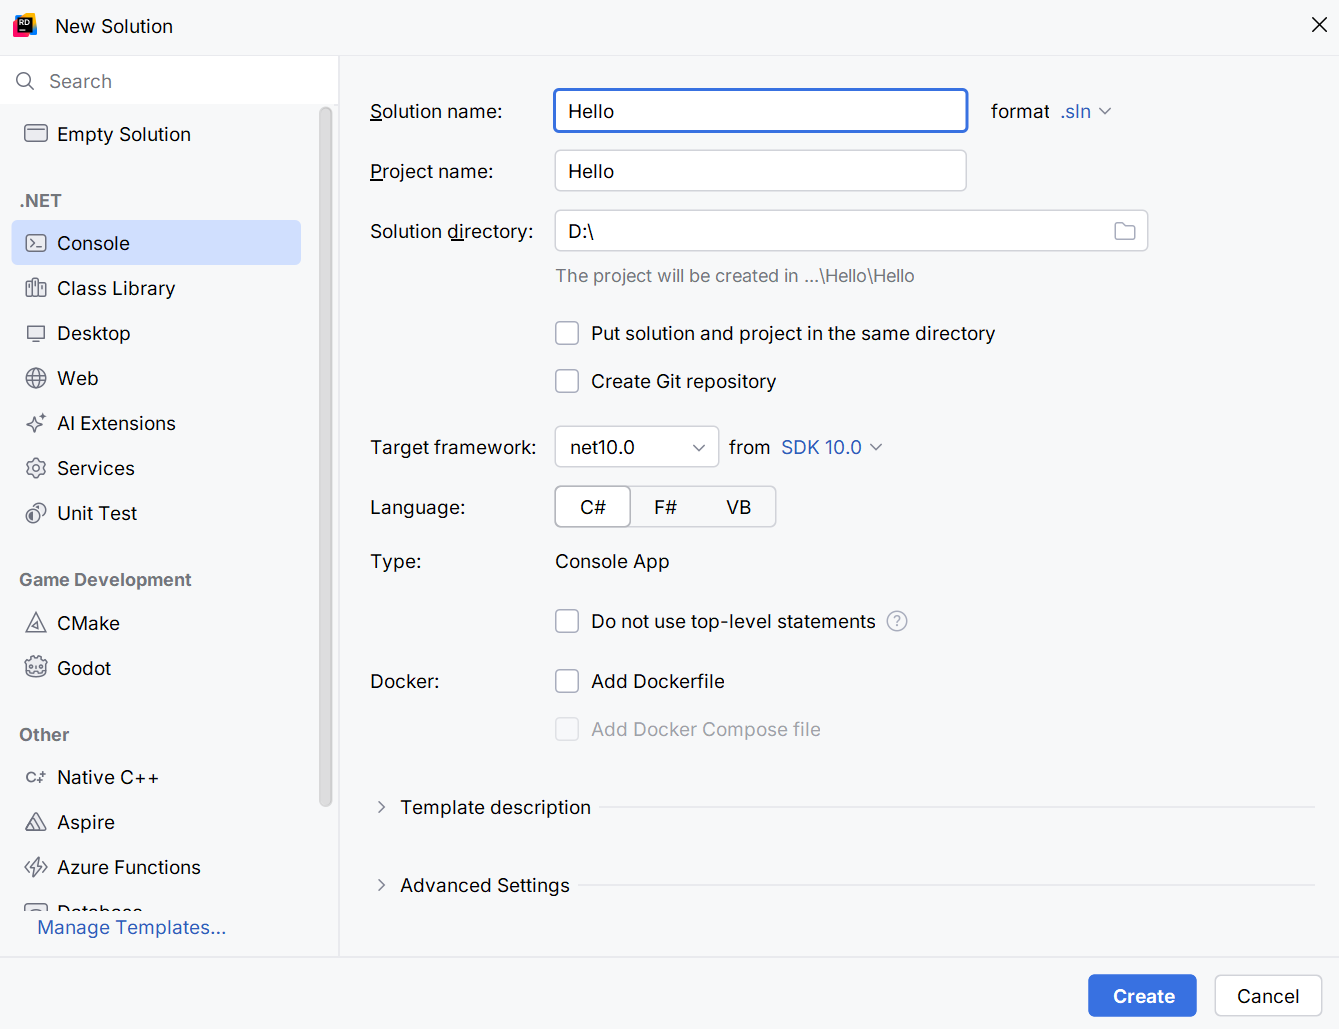
Figure 1.22. Creating a console solution in Rider
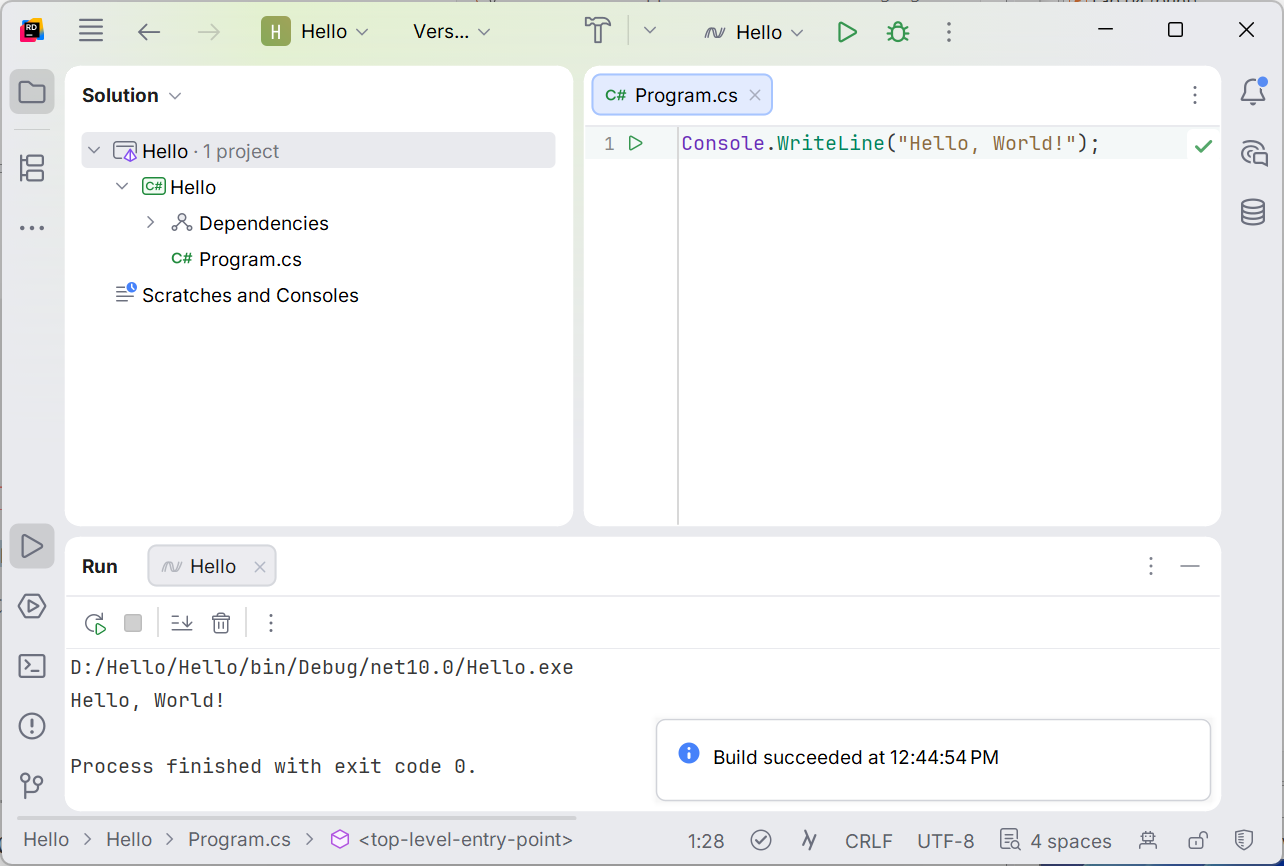
Figure 1.23. Running a console project in Rider
Rider documentation: https://www.jetbrains.com/help/rider/.