
English
Visual Studio and your first project
Installing Visual Studio 2026
An integrated development environment (IDE) combines an editor, build tools, a debugger, and Git integration. In this course, it is Visual Studio 2026: https://visualstudio.microsoft.com/downloads/. The Community, Professional, and Enterprise editions have different licensing terms and feature sets. Community is enough for the course exercises; your right to use it is defined by the current terms at https://visualstudio.microsoft.com/license-terms/. Classroom training is among the permitted scenarios, but the fact that Community is free doesn’t mean unlimited use by any organization.
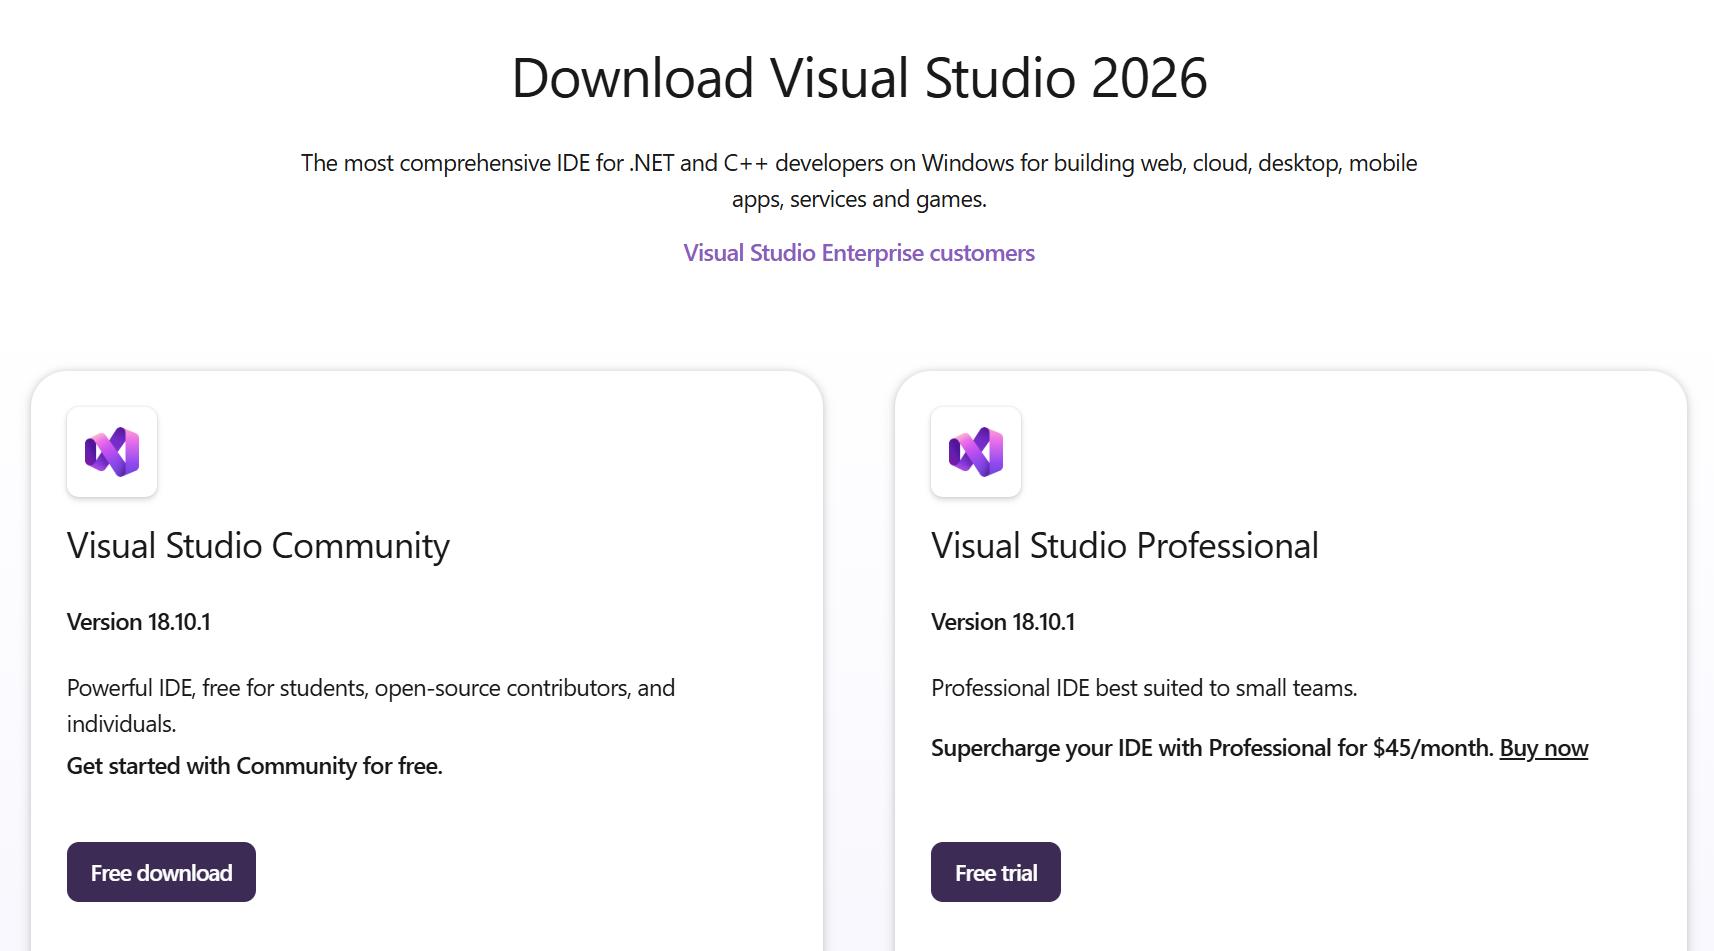
Figure 1.3. Downloading Visual Studio
For the course materials, we choose Windows 11 x64. According to the verified Microsoft requirements, the minimum is 4 GB of RAM, and 16 GB is recommended for typical professional solutions. A typical installation takes 20–50 GB; the actual size depends on the components. The minimum resolution is 1366×768 at 100% scaling. An SSD speeds up the work. The requirements page: https://learn.microsoft.com/visualstudio/releases/2026/vs-system-requirements. Before installing, check the available space and support for your specific OS version.
Run the installer downloaded from the official website. A workload is a set of components for a particular kind of development. On the Workloads tab, select Desktop development with C++ (Fig. 1.4). Without this workload, having Visual Studio installed doesn’t yet mean you have a C++ compiler. Detailed instructions: https://learn.microsoft.com/cpp/build/vscpp-step-0-installation.
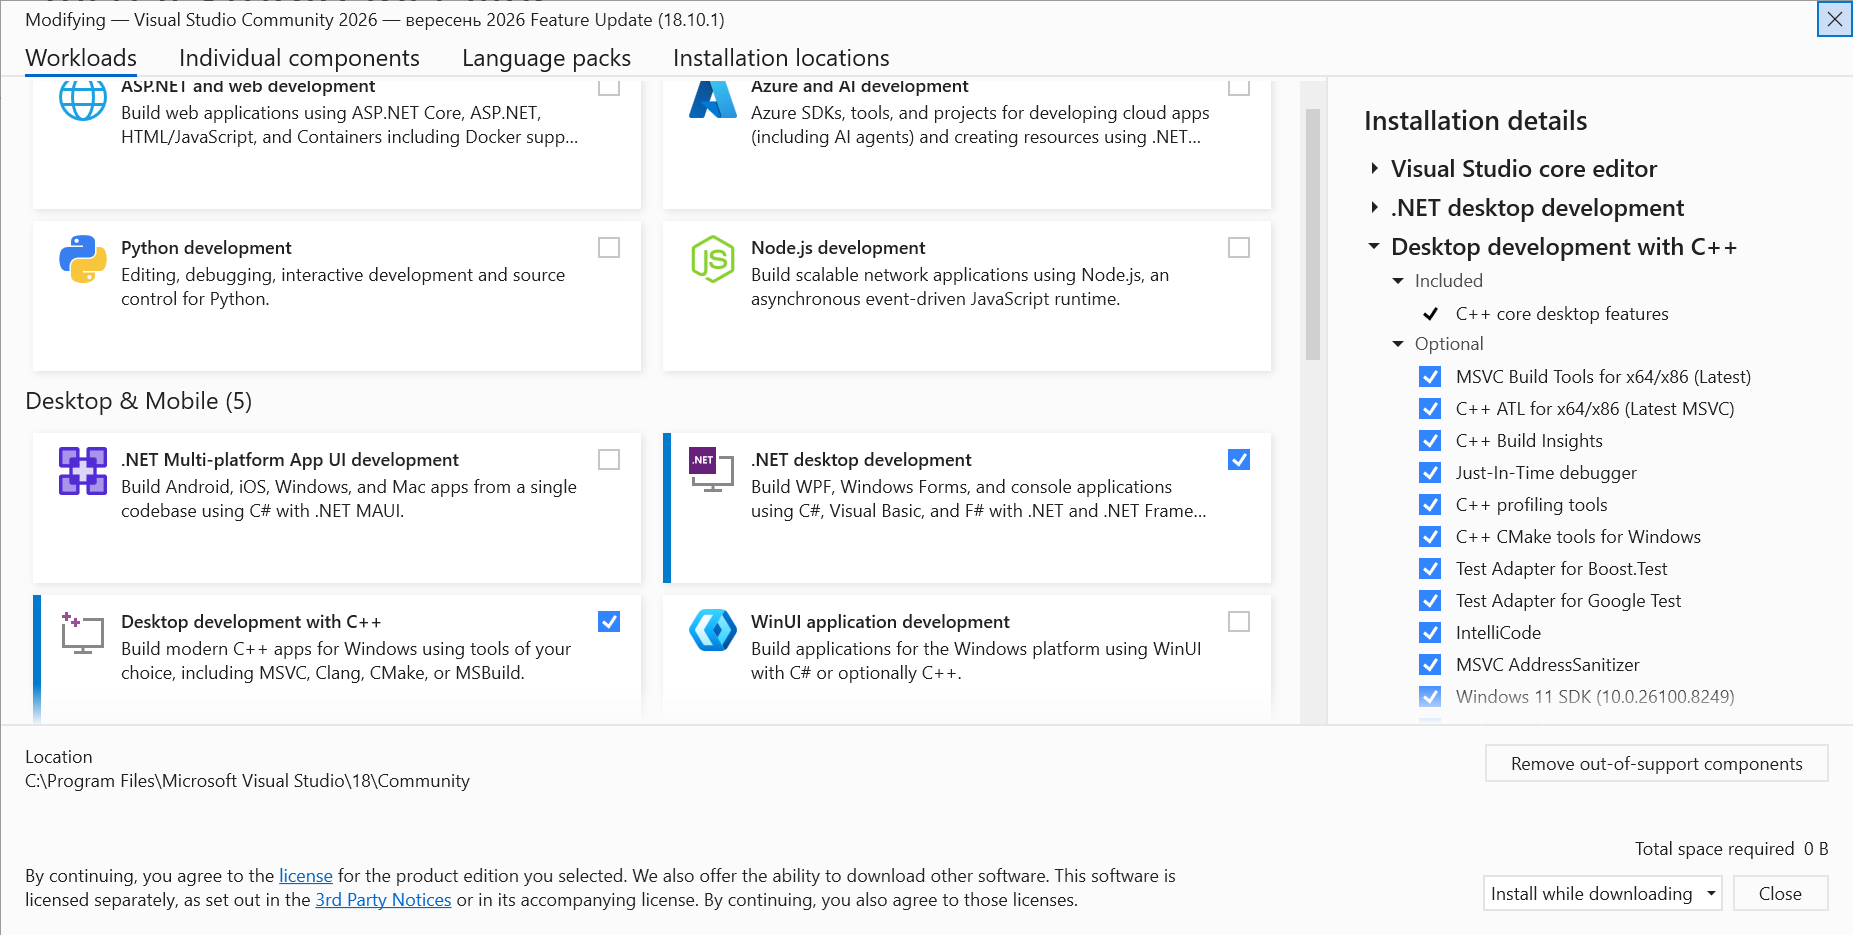
Figure 1.4. Selecting the workload for C++ desktop development
In the right-hand Installation details pane, check the MSVC tools for x64/x86 and the Windows SDK. An SDK (Software Development Kit) contains headers, libraries, and tools for working with the platform. CMake tools are needed for CMake projects, AddressSanitizer finds some memory errors, and vcpkg helps you manage third-party libraries. For your first program, the main ones are MSVC and the SDK; we’ll use the other tools as needed. The exact version suffixes of the components depend on the Installer update, so choose the current components of your installed Visual Studio rather than looking for an outdated number from someone else’s screenshot.
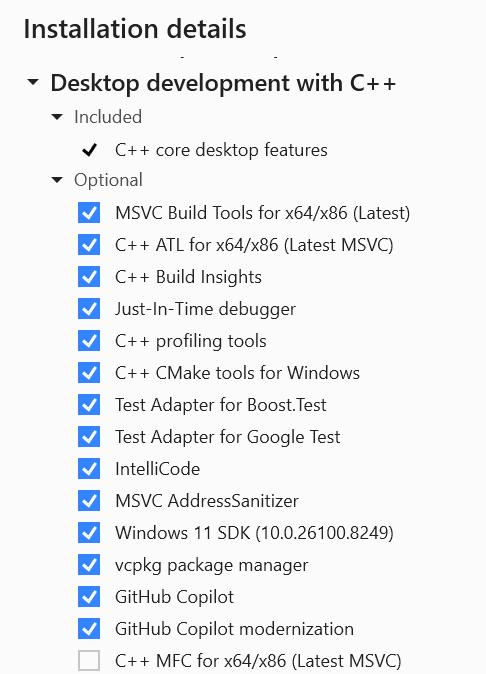
Figure 1.5. C++ environment components
On the Language packs tab, select English (Fig. 1.6) so that the menu names match the materials. Click Install and wait for it to finish. You can change the set of installed components through Tools → Get Tools and Features… and the Modify button in the Installer. We’ll install command-line Git separately from the official website: don’t assume that every IDE installation option automatically adds git to PATH.
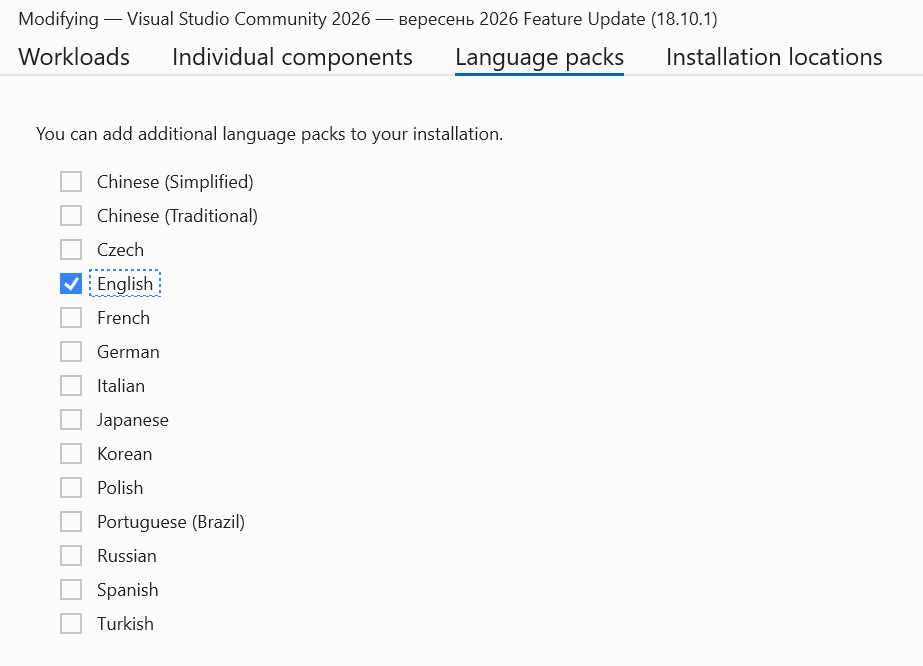
Figure 1.6. Selecting the English language pack
Your first console project
A console application works with text input and output. It is convenient for learning: you can focus on the program’s behavior without creating a graphical interface. On the Visual Studio start screen, select Create a new project (Fig. 1.7). You open an existing solution through Open a project or solution, and you copy a repository from a server through Clone a repository. These are different starting actions.
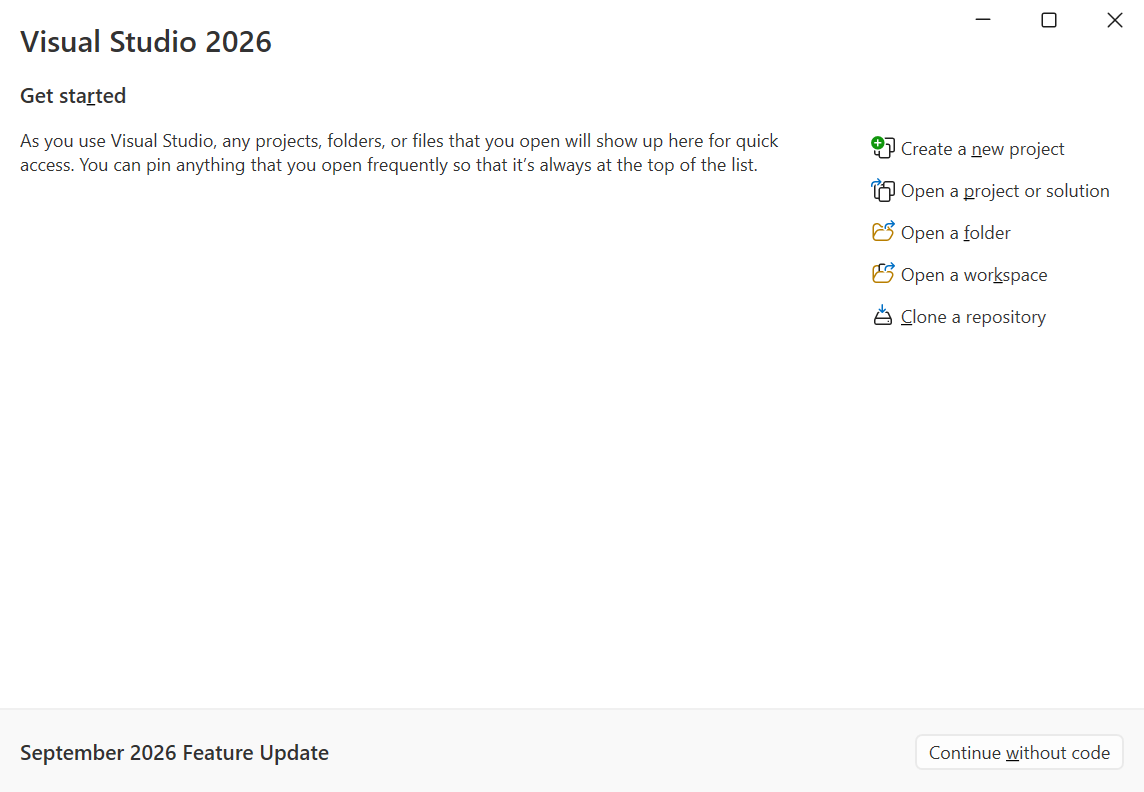
Figure 1.7. The Visual Studio start window
In the template list, set the language filter to C++ and select Console App with the C++, Windows, Console tags (Fig. 1.8). A template with a similar name for C# creates a different type of project. Click Next. If the template you need is missing, go back to the Installer and check the C++ workload.
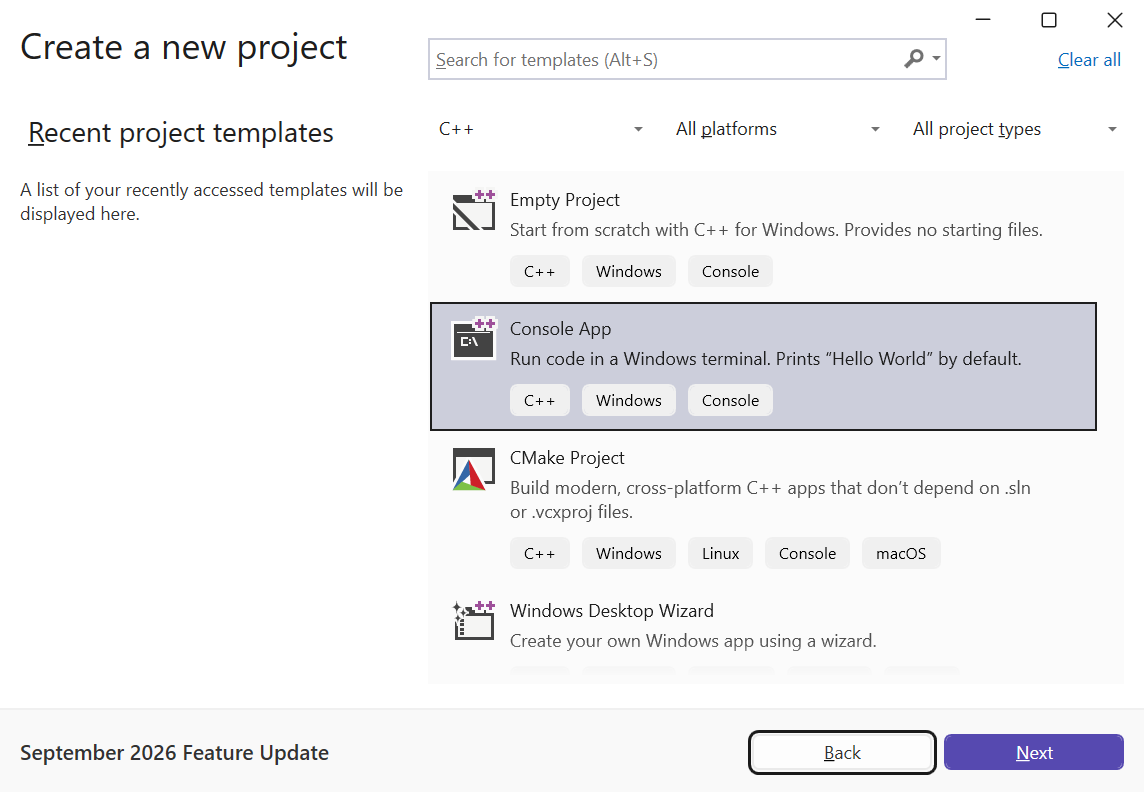
Figure 1.8. The C++ console app template
In Configure your new project, set Project name to Hello, Location to D:\Labs, and Solution name to Labs (Fig. 1.9). You can use another writable folder; remember its full path. The project name is not the greeting text: it determines the names of the service files and usually of the executable file. Click Create.
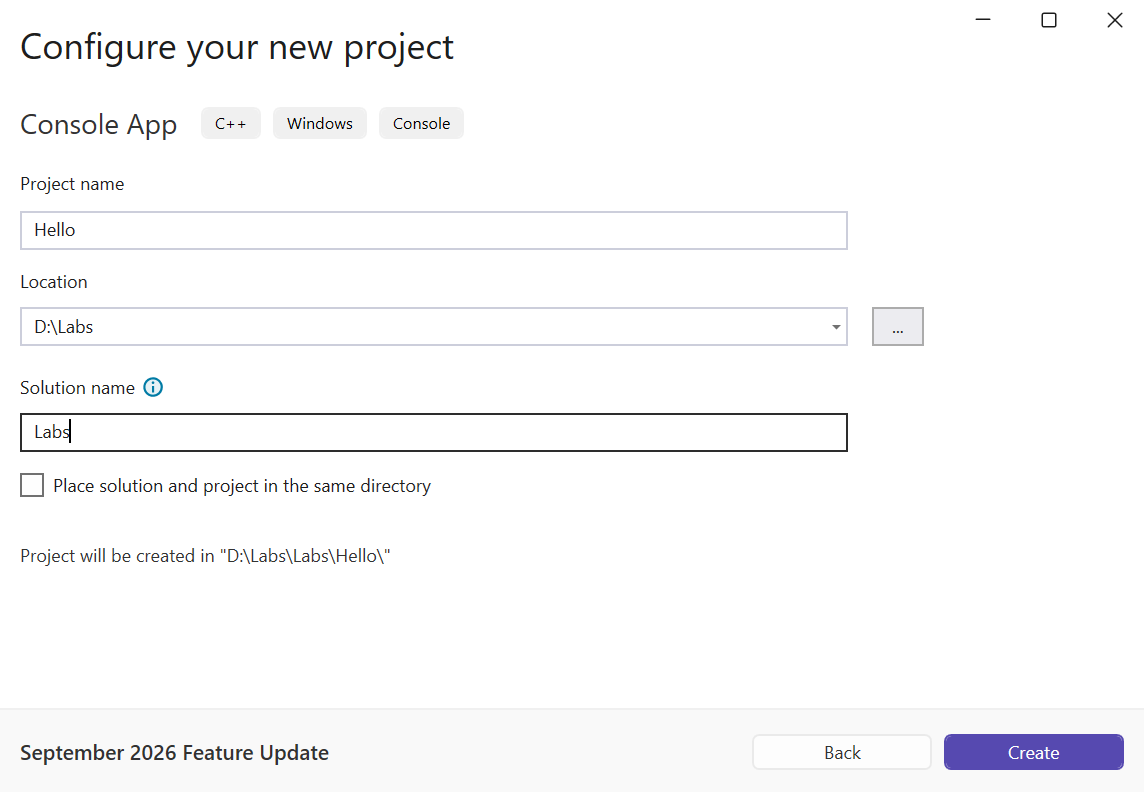
Figure 1.9. Project name and solution location
In the main window, the editor shows Hello.cpp, and Solution Explorer shows the solution structure (Fig. 1.10). The Output window contains the build log, and Error List contains the list of diagnostic messages. The toolbar at the top determines the configuration, the platform, and the startup project. An open editor tab by itself doesn’t change the startup project if the solution contains several.
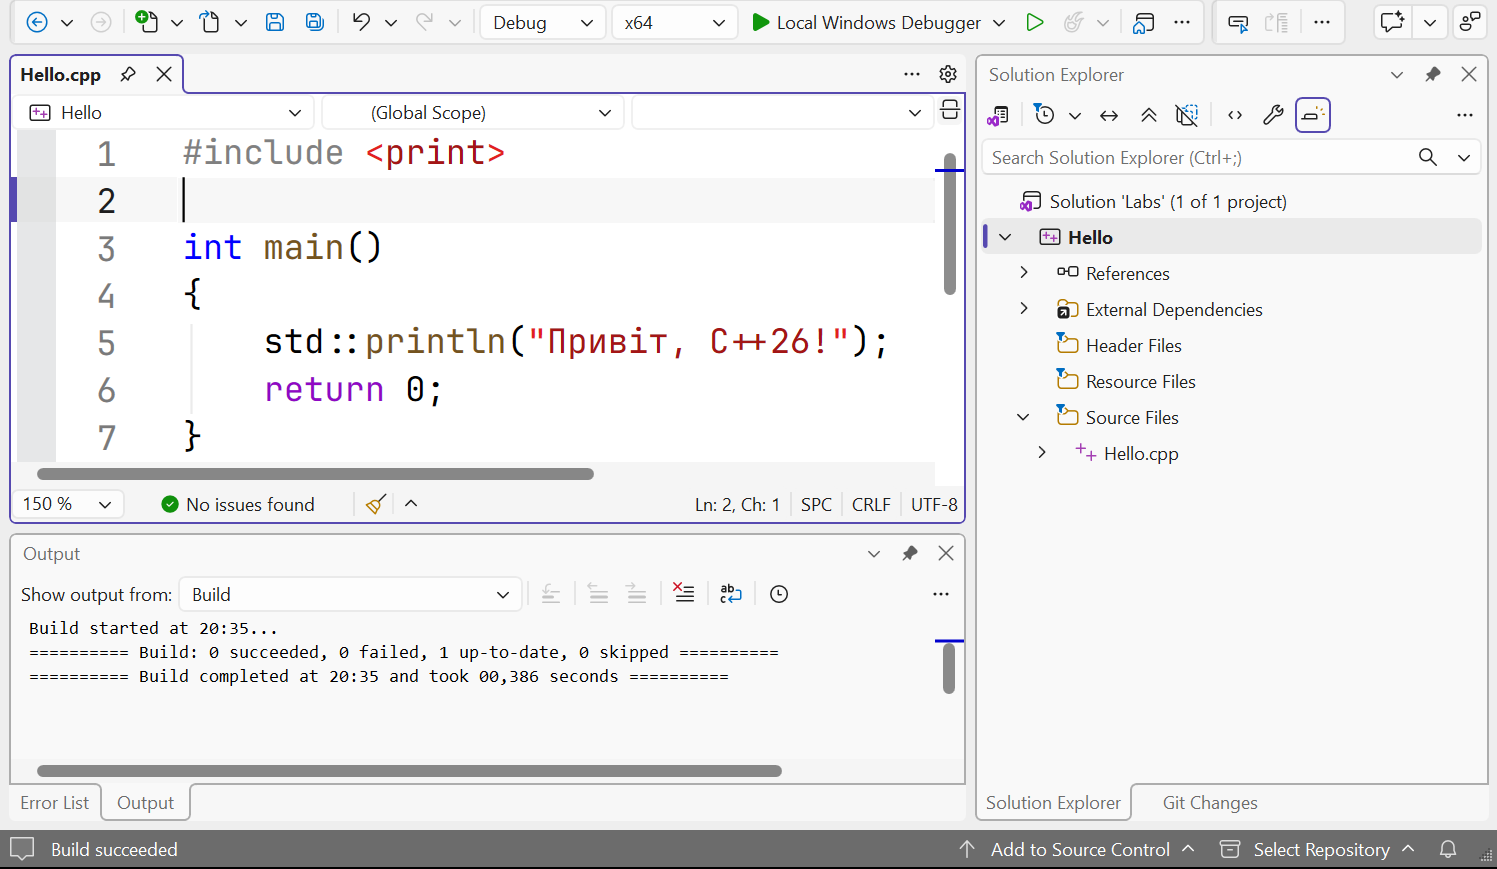
Figure 1.10. The editor and the structure of the Hello project
Setting the standard and diagnostics
Open the properties of the project, not the solution: in Solution Explorer, right-click Hello and select Properties. At the top, select Configuration: All Configurations, Platform: x64. Under Configuration Properties → General, find C++ Language Standard and set the /std:c++latest mode (Fig. 1.11). This is where the property is located in Visual Studio 2026 18.10.1; in other versions it may be on the C/C++ → Language page. Go by the property name and the switch that ends up on the compiler command line.
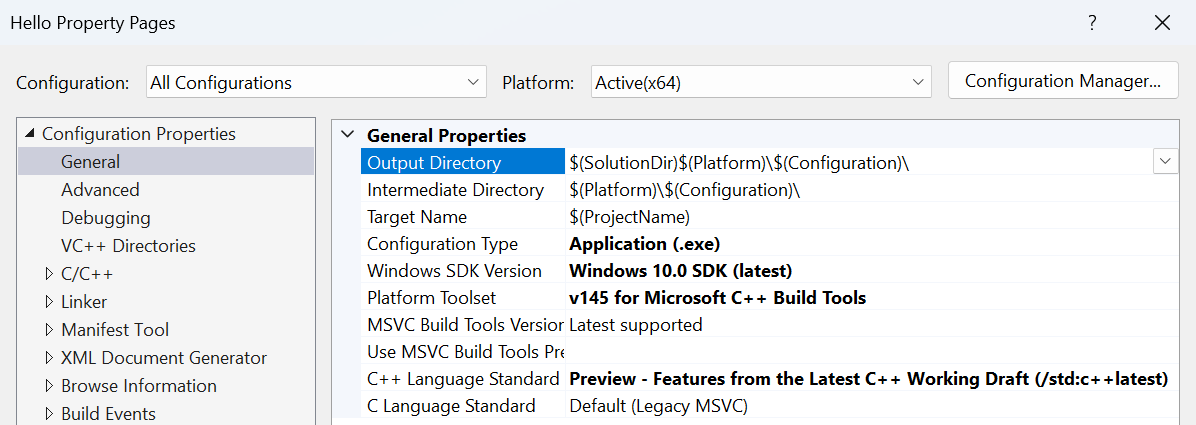
Figure 1.11. Selecting the C++ standard mode
Under C/C++ → General, select Warning Level /W4. Under C/C++ → Language, set Conformance mode to /permissive-. Under C/C++ → Command Line → Additional Options, add /utf-8. These switches mean, respectively, more detailed warnings, stricter conformance to the standard, and UTF-8 for source code and ordinary string literals. For exception handling, this course uses /EHsc; this option is usually already set in the console project template.
Debug contains information useful for debugging and, with the default settings, disables optimization. Release usually optimizes the code. These are sets of options, not different languages. The x64 platform defines the target architecture of a 64-bit process. If you configure only Debug, Release may keep a different standard; that is exactly why we selected All Configurations at the start. After changing the options, click Apply and OK.
The structure of your first program
Replace the initial contents of Hello.cpp with the complete program below. This is Example 1, “Hello, C++26!”. Save the file in UTF-8 and run Build → Build Solution or press Ctrl+Shift+B.
cpp
#include <print>

int main()
{
    std::println("Hello, C++26!");
    return 0;
}
The #include <print> directive provides standard library facilities for formatted output. Angle brackets mean the header is searched for in the configured system directories. You don’t put a semicolon after an #include directive. The main function is the entry point of the program; int specifies the type of its result, and the empty parentheses mean it has no parameters in this form. Curly braces delimit the function body.
std is the namespace of the standard library. The :: operator specifies where to look for a name: std::println is a library function, not an arbitrary word chosen by the author. It prints text and adds a line break. std::print performs formatted output without an automatic line break. Text in double quotes is a string literal. Each call statement ends with ;.
return 0; ends main and passes a success code to the environment. This zero is not printed in the console. For main, reaching the closing brace also means successful completion, but writing it explicitly helps you see the difference between output and returning a value. Nonzero codes are used to report failure; the program sets the specific value.
Press Ctrl+F5 to run without debugging. The program’s output:
text
Hello, C++26!An extra line about the process exiting or pressing a key is printed by the environment, not by the function shown. The F5 key runs the program with the debugger. Don’t add system("pause"): it runs a separate system command that the program logic doesn’t need. Outside the IDE, run the .exe in an already open terminal so that you can see the output after the program ends.

Figure 1.12. Output of the first program
UTF-8, comments, and the standard module
An encoding describes how characters are represented as bytes. For Ukrainian text, save .cpp files in UTF-8 and pass /utf-8. The modern implementation of std::println in MSVC supports Unicode output to the Windows console. Don’t mix this up with arbitrary _setmode recipes for wide streams: those are different APIs. If the text is redirected to a file, that file also has to be opened as UTF-8. A font’s ability to display a letter and the file encoding are separate conditions. For ordinary numbers, the locale-independent format uses a period, for example 12.50, regardless of the Ukrainian regional format.
A comment explains intent and is not executed. // starts a comment that runs to the end of the line, and /* ... */ delimits a multiline comment. Don’t comment the obvious, like “prints text” before every output statement; explain units of measurement, assumptions, and nontrivial formulas. Names in C++ are case-sensitive: Main and main are different names.
The C++23 standard also introduced the std library module. Instead of including a header, your first program can look like this in full:
cpp
import std;

int main()
{
    std::println("Hello, C++26!");
    return 0;
}
For this form, it isn’t enough to mechanically replace the first line. In the properties of the MSVC project, under C/C++ → Language, enable Build ISO C++23 Standard Library Modules and the /std:c++latest mode. The build system must build the module and provide it to the compiler. Microsoft’s instructions: https://learn.microsoft.com/cpp/cpp/tutorial-import-stl-named-module. Don’t add both import std; and headers just to fix a configuration error. The main examples of this topic use #include <print>: this makes the build path the same in the IDE and in a simple cl command.