
English
What Chatex does
The messenger we are going to build
Chatex is a web messenger in the style of Telegram. It runs in any modern browser and adapts to phones, tablets and desktops: on a wide screen the chat list and the conversation sit side by side, on a phone they are separate screens with a bottom navigation bar (Fig. 1.2).
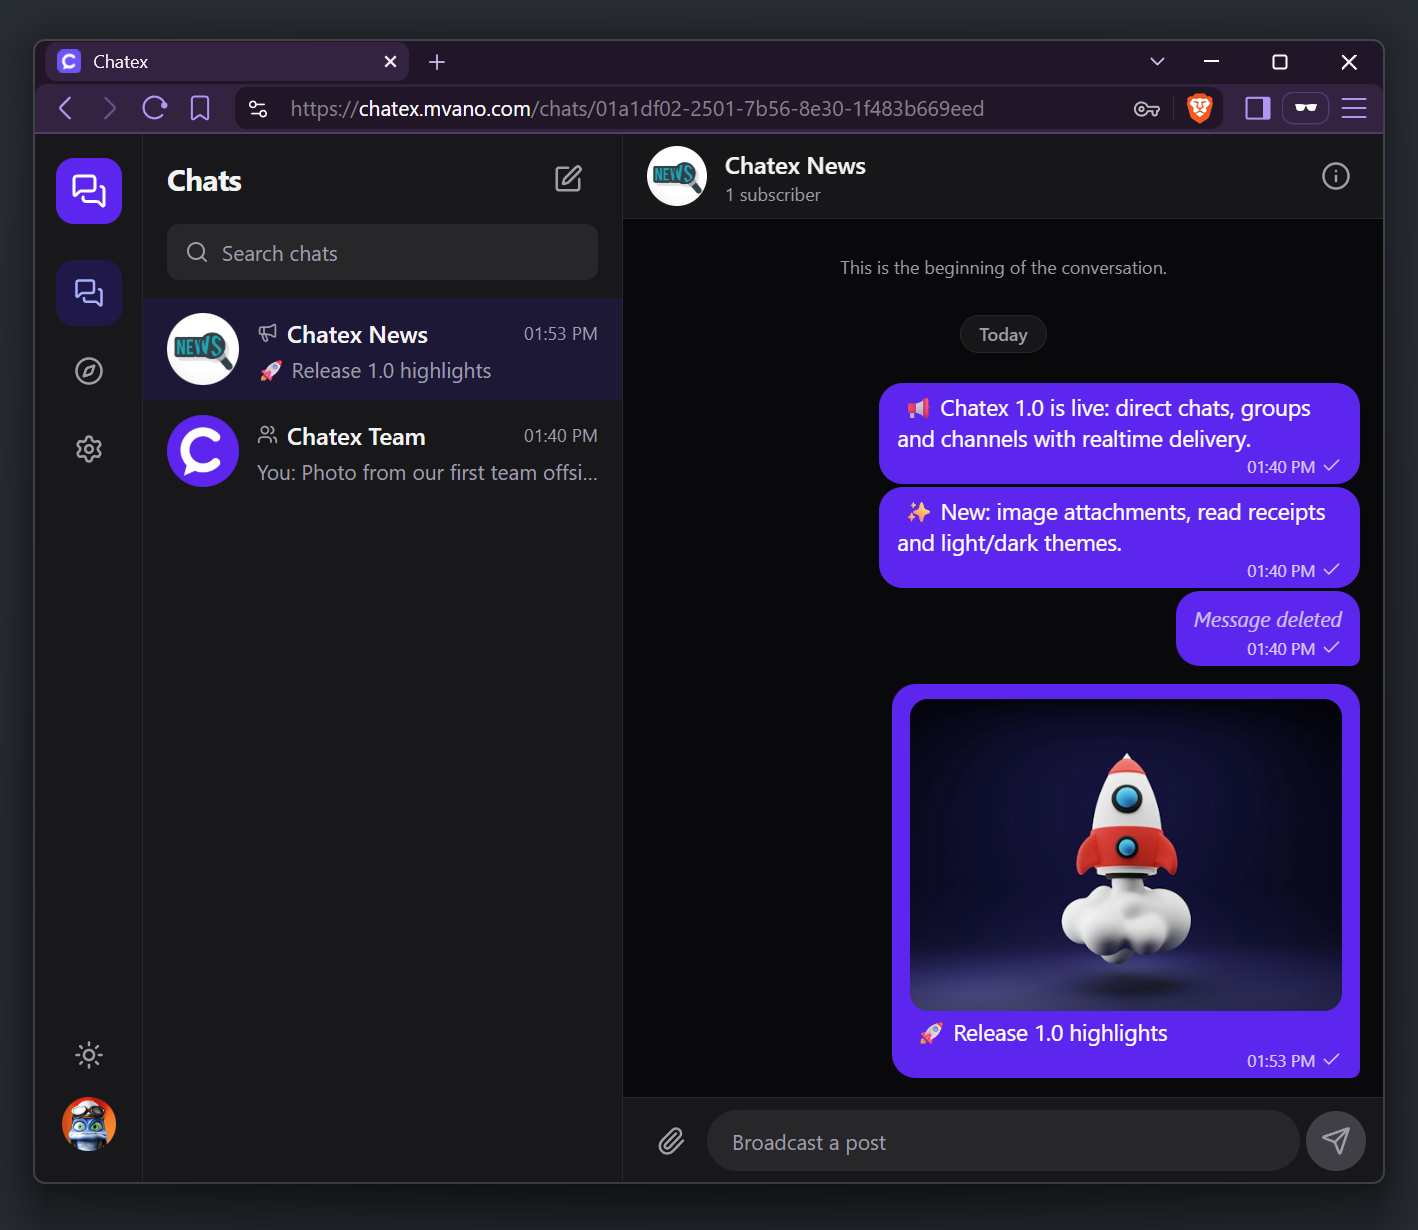
Fig. 1.2. Chatex on a desktop: the chat list, a conversation and the chat information panel
The features are grouped by area. Each area becomes one or more topics of the tutorial, given in brackets.
- Accounts (topics 8, 13, 16). Registration with a user name, an email and a password; sign-in by user name or email; the account is locked for 15 minutes after 5 failed attempts. The browser receives a short-lived access token (a JWT valid for 15 minutes) and a long-lived refresh token in an HttpOnly cookie. Refresh tokens rotate: each use issues a new one, and reusing an old token ends every session of that user, because it means the token was stolen.
- Profiles (topics 9, 21). A display name, a short bio and an avatar; the time the user was last seen; a search for users by name.
- Chats (topics 10, 18, 21). Direct chats between two users, groups of up to 1000 members and channels where only the owner and admins post. A group or a channel can be public, with a unique
@handlethat anyone can find and join, or private and invisible to non-members. - Messages (topics 11, 19). Sending, replying, editing and deleting messages; read receipts and unread counters; a history that loads older pages as you scroll up.
- Attachments (topics 9, 13, 19). Files up to 20 MB of allowed types (images, PDF, text, archives, Office documents); only chat members can download them.
- Real time (topics 14, 20). New, edited and deleted messages, read receipts, membership changes, typing indicators and online presence appear at once in every open window, without reloading the page.
- Operations (topics 13, 22–24). Rate-limited sign-in, a health check, an hourly cleanup of unused uploads and old tokens, automated tests and checks on every push, deployment to an Ubuntu server with automatic rollback.
Chat types and roles
The rules of chats are the most "business-like" part of Chatex: they decide who can see a chat, who can post and who can manage members. They are implemented in topic 10; here is the summary (Table 1.1).
Table 1.1. Chat types
| Type | Members | Who posts |
|---|---|---|
| Direct | exactly two users; one chat per pair, created on first use | both |
| Group | up to 1000 | everyone |
| Channel | unlimited subscribers | the owner and admins only |
Every member of a chat has a role: owner (exactly one per group or channel, the creator), admin, member (in direct chats and groups) or subscriber (a read-only member of a channel). A person who joins a group becomes a member; a person who joins a channel becomes a subscriber. The full list of permissions is in Docs/ChatRules.md.
Run the reference version
The best way to understand what we are going to build is to use it. Clone the finished project into a separate folder, for example D:\Work\Chatex-Reference, and keep it next to your own code for the whole tutorial: you will compare your files with it whenever something does not work.
Software first
Running the reference version needs the .NET 10 SDK, Node.js 24, Docker Desktop, Git and PowerShell 7. If they are not installed yet, follow Install the tools in topic 2 first and come back.
Step 1. Clone the repository at the tutorial commit
powershell
git clone https://github.com/musicvano/Chatex.git D:\Work\Chatex-Referencepowershell
cd D:\Work\Chatex-Referencepowershell
git switch --detach 27c83c6The last command moves the working copy to commit 27c83c6, the version this tutorial describes. Later commits may change the code; the pages always follow this one.
Step 2. Prepare and start
Start Docker Desktop and wait until it reports that the engine is running. Then run the setup command once:
powershell
./Run.ps1 setupIt restores the .NET tools and NuGet packages, installs the npm packages of the Angular app, starts PostgreSQL 18 in a Docker container and creates the database tables. The first run downloads a few hundred megabytes, so it takes several minutes.
Start the API:
powershell
./Run.ps1 apiOpen a second terminal in the same folder and start the Angular development server:
powershell
./Run.ps1 webCheck
http://localhost:4200shows the Chatex sign-in page.http://localhost:5214/scalarshows the interactive API reference: every HTTP endpoint with its parameters and responses.http://localhost:5214/healthanswersHealthy.
Step 3. Chat with yourself
- In the normal browser window, open
http://localhost:4200, choose Create an account and register the useralice(any email such as[email protected], a display name and a password of at least 8 characters with a digit). - Open a private (incognito) window — it has its own cookies, so it can hold another session — and register
bob. - As Alice, press New chat, find Bob by name and send him a message.
- Watch Bob's window: the chat appears in his list with an unread counter, without reloading the page. Open it and start typing — Alice sees "typing…".
- Make the window narrow, or open the developer tools and switch on the device toolbar: the layout changes to the phone version.
Check
Messages appear in the other window within a fraction of a second, the unread counter disappears when Bob opens the chat, and Alice sees that her message was read.
When you finish, stop both servers with Ctrl+C. The database container keeps running in the background; ./Run.ps1 db-stop stops it (the data stays in its Docker volume).
Ports
The reference version and the Chatex you are going to build use the same ports (5432, 5214 and 4200) and the same Docker container name. Run only one of them at a time: stop the reference servers and run ./Run.ps1 db-stop in its folder before you start your own.